What Is the Steam Content File Locked Error?
Not only are large file updates annoying, but running into errors can further aggravate your frustrations. However, what does “The Steam Content File Locked” error actually mean? This error occurs when one or more of Steam’s game files is locked and cannot be written over. The reasons may vary. For instance, it may result from corrupted files or issues with your hard drive. Maybe the files are currently open in another application. Usually, this error message will appear as either a prompt or written next to the game’s status. Because its root cause may vary, you will be required to try several fixes before you can fix it. Nevertheless, we’ll cover the most relevant and effective in this guide.
How to Fix the Steam Content File Locked Error
Reboot Computer
As the rule of thumb goes, the first thing you should do when you encounter any error on your PC is, restart it. This will most likely clear any locks on Steam’s game files. Sometimes games are the result of multiple applications and processes. When you close your game, it’s supposed to release these processes. However, sometimes it fails to terminate these processes, and they may still be running in the background. While you may be able to track the process using Task Manager, it would be easier to restart your PC.
Run the Steam Client as Administrator
The Steam game and application folder are located in Program Files (or Program Files (x86)). Only programs and users with administrative rights can make changes to this folder structure. Thanks to one of its updates, Windows may be applying stricter security rules and blocking Steam from writing to its folders. The best way to remedy this is to run Steam as an Administrator. You can do that by:
Open the Windows Start MenuSearch for SteamRight-click on itSelect Run as Administrator
Once you have the Steam client running as an Administrator, you can try resuming game downloads to see if you’re still receiving the error message.
Review Your Antivirus Settings
Commonly, your antivirus runs real-time scans that detect changes in your operating system’s folder structure. Often, they may discover false positives. In other words, your antivirus may erroneously label Steam’s downloading files as malicious software. You need to check if your antivirus has quarantined or removed the files. If you’re running multiple antiviruses, you’ll need to check the quarantine volt of each. Once that’s done, you need to ensure that the Steam folder has an exception so your antivirus software can skip scanning it. To check for quarantined or deleted files from your Windows Security (aka Windows Defender), do the following:
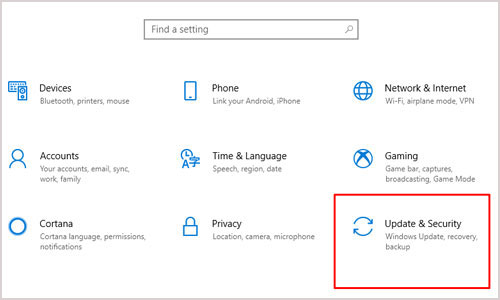
Close the Steam client (if it’s open)Open the Windows Start MenuClick on the Settings iconClick on Update & SecuritySelect Windows Security from the left panelClick on Virus & threat protection from the main panelClick on Protection historyScan through the list until you find an item that’s linked with your Steam folder and click on itExpand the Actions drop-down box and select Allow for each file linked to your Steam folder
Once you restore or allow the files, you need to set an exception rule for the Steam folder so that Windows Security doesn’t interfere with future Steam downloads. While in the Virus & threat protection screen:
Click on Manage settings from the main panelScroll down until you find ExclusionsClick on Add or Remove ExclusionsClick on the Add an exclusion buttonSelect FolderNavigate to where your Steam folder is stored, e.g., C:\Program Files (x86)Single-click on the Steam folderClick on the Select Folder buttonConfirm your selection and exit the Windows Security settings screen
Once this is done, restart the Steam client and check if you are still encountering the same error.
Clear Steam’s Download Cache
Like most P2P file-sharing software, Steam downloads pieces of games from different servers. Once it’s downloaded all the pieces, it compiles them together and installs the game on your PC. Temporary download files are kept in a Steam download cache folder. Sometimes this folder may become bloated and filled with corrupt data. To get Steam to work faster and save storage space on your computer, you can clear Steam’s download cache. You can do this by:
Run the Steam client (we recommend running as admin)Click on the Steam menu item from the top menu barSelect Settings from the context menuSelect Downloads from the left panelClick on the button labeled CLEAR DOWNLOAD CACHEClick on the OK button on the confirmation dialog
The Steam client will clear its download cache and restart. You can then log back in and see if you’re still experiencing the Steam Content File Locked Error. There is another way to ensure that your Steam download cache is deleted with no residual files. You can use Windows File Explorer to find the Steam cache folder and delete it. You can do this through the following steps:
Open Windows Task Manager (Ctrl + Shift + Esc)Click on the Steam (32-bit) process and click on End task – this will close all Steam-related processes, but if it doesn’t, you’ll have to search for each process and end it manuallyOpen a Windows Run Dialog (Winkey + R)Type %localappdata% into the text field and hit EnterSearch for the Steam folder in the file listRight-click on it and select Delete from the context menuConfirm the deletion
Once you’ve completely deleted the Steam folder, you can restart the Steam client to check if the Steam Content File Locked error has been resolved.
Run Netsh Winsock Reset Command
The Windows Sockets API (Winsock) basically contains configuration settings for internet connectivity. However, often it may become corrupt due to an error or a malicious script. It’s possible that this may be causing the Steam Content File Locked error. To fix it, all you need to do is reset Windows’ Winsock.
Open the Windows Start MenuSearch for CMD Right-Click on the first match (Command Prompt)Click on Run as AdministratorClick on Yes to confirm the selectionType netsh winsock reset into the command prompt screen and hit Enter
After it’s done, restart your computer and test if Steam still displays the Steam Content Locked error.
Verify Integrity of Game Files
The game files may be corrupted. This may cause Steam’s Content Locked Error. To check if this is the case, you can verify the integrity of the game files you’re trying to update. To accomplish this, you need to do the following:
Run the Steam client (preferably as an admin)Right-click on the affected gameSelect Properties from the context menuClick on LOCAL FILES from the left panelClick on Verify integrity of game files…
Steam will take a moment to validate the integrity of your game files. If it finds any corruption, it will automatically fix the errant files. Once this is done, you can attempt to update the game again and see if this solves the issue.
Check Your Disk for Errors
Often, a write disk error may be the culprit behind the Steam File Content Locked error. To ensure that hard disk read and write errors aren’t causing issues with Steam download and installs, we recommend that you run a Check Disk command on your main hard drive.
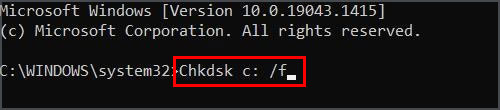
Run Command Prompt as an AdministratorType Chkdsk c: /f into the terminal windowHit enter
The command should check for any errors and repair them. You can read more about it from Microsoft’s official CHKDSK documentation.
Check Your Firewall Settings
The Windows Firewall is designed to block any suspicious internet traffic. Most applications are restricted to access to local networks. Some are completely blocked off. While Steam may have full access to private and public networks, the game may not. To remedy this, you’ll need to create an exception for the game on Windows Firewall.
Open a Run Dialog (Winkey + R)Type Control Panel into the text field and hit the Enter keyMake sure that you’re viewing Control Panel’s items as either large or small icons (click on the View by drop-down menu near the top right corner) Click on Windows Defender FirewallClick on Allow an App Through Windows Defender Firewall from the left panelClick on the Change settings button near the top right corner of the windowClick on the Allow another app… button near the bottom of the windowNavigate to the game file in Steam’s game folder and open it, e.g., C:\Program Files (x86)\Steam\steamapps\common\EndlessWorld\EndlessWorld.exeClick on the Add buttonUnder the Allowed apps and features list, ensure that both the Private and Public boxes are ticked for your Steam gameClick on the OK buttonClose the Control Panel and exit Steam
Relocate Game Files to an Alternative Disk
If you’re still experiencing the Steam Content File Locked error and none of the above steps worked for you, you can try moving where Steam’s game files stay. Of course, this will require you to have an additional hard drive with ample space (preferably internal). Nevertheless, to migrate Steam’s game files to an alternative disk, do the following:
Run the Steam ClientClick on the Steam item from the top menu barSelect SettingsClick on Downloads from the left panelClick on the button labeled STEAM LIBRARY FOLDERSClick on the plus sign to create a new tabUse the dialog to select an alternative folder in another driveClick on the Select button after you’ve chosen a new directory and named your new Steam Library folderClick on SettingsSelect the Make Default item from the context menuClose the windowClick on the OK button from the Settings screenIn the main Steam window, click on LibraryRight-click on the game with the Content File Locked error and select PropertiesClick on LOCAL FILES from the left panelClick on the Move install folder from the main panelUse the drop-down menu to select the new drive you specified earlier Click on the Move button
After you click on the Move button, Steam will move the game files to the new drive and folder. How long it will take depends on the size of the game, what type of hard drive you’re using, and your system’s specs. However, once it’s done moving all your files, you can test if Steam still encounters a Steam Content File Locked error when you try to update the game.
Delete Game Files
If all else fails, sometimes it’s good to start over. If you’ve reached this point of the guide and none of the above steps worked for you, you can try deleting your local game files and reinstalling them.
Open the Steam ClientClick on the LIBRARY tabRight-click on the affected gameClick on PropertiesSelect LOCAL FILES from the left panelClick on the Browse… button on the main panelSelect all files from the Windows File Explorer window and Delete themClose the Windows File Explorer window once the deletion is completeClick on the Verify integrity of game files… button
Once you’re done with the above steps, Steam will try to download your game from scratch. This will include the latest updates and patches.