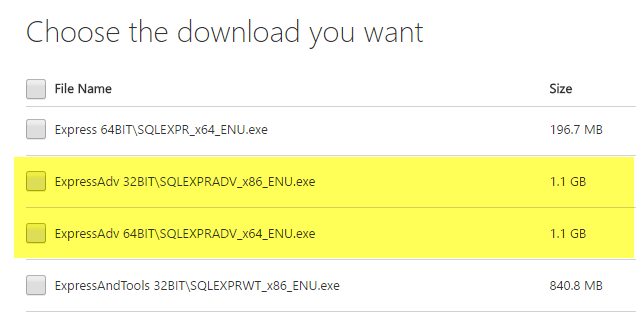
First, you need to make sure you have SQL Server or SQL Server Express installed on your computer. When downloading SQL Server Express on a personal computer, make sure you download the version with Advanced Services. If you don’t, then the database engine won’t be installed and you’ll have SQL Management Studio without any database instance to connect to.
Once you have SQL Server installed properly, you can continue with the steps below to import the Access database into a new database in SQL Server.
Transfer Access Database to SQL Server
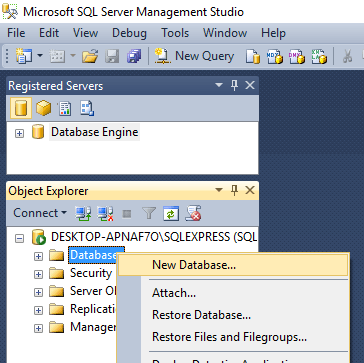
Open SQL Server Management Studio and connect to the database server you want to import your Access database into. Under Databases, right-click and choose New Database. If you already have a database and you simply want to import a couple of tables from Access, then just skip this and go to the Import Data step below. Just right-click on your current database instead of creating a new one.
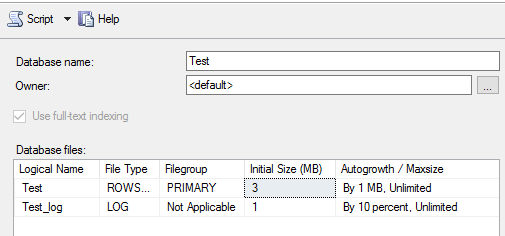
If you’re creating a new database, go ahead and give it a name and configure the settings if you want to change them from the defaults.
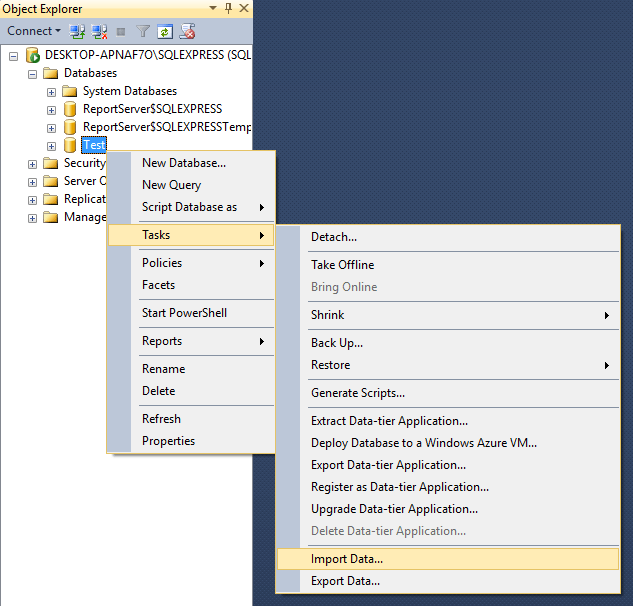
Now we need to right-click on the Test database we just created and choose Tasks and then Import Data.
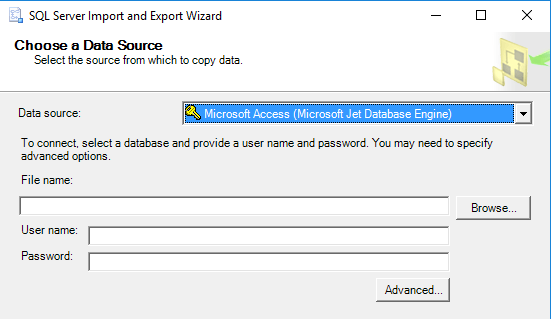
On the Choose a Data Source dialog box, select Microsoft Access (Microsoft Jet Database Engine) from the drop down box.
Next to File name, click on Browse and navigate to the Access database you want to import and click Open. Note that the database cannot be in Access 2007 or higher format (ACCDB) as SQL Server does not recognize it! So if you have a 2007 to 2016 Access database, first convert it to the 2002-2003 Database format (MDB) by going to File – Save As. Go ahead and click Next to choose the destination. Since you right-clicked on the database you wanted to import the data into, it should already be picked in the list. If not, select SQL Native Client from the Destination drop down. You should see the database instance under Server Name and then be able to choose the specific database at the bottom once you pick your method of authentication.
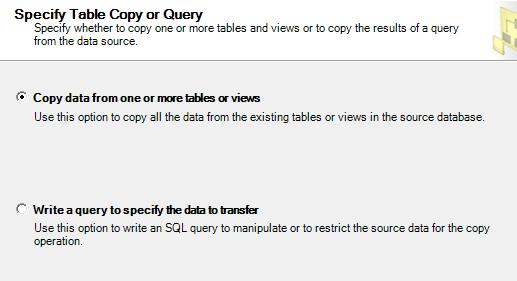
Click Next and then specify how you want to transfer the data from Access to SQL by choosing either Copy the data from one or more tables or Write a query to specify the data to transfer.
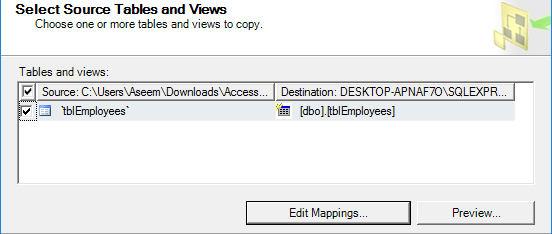
If you want to copy all the tables or just some of the tables from the Access database without any data manipulation, choose the first option. If you need to copy only certain rows and columns of data from a table, then choose the second option and write a SQL query. By default, all the tables should be selected and if you click the Edit Mappings button, you can configure how the fields map between the two tables. If you created a new database for the import, then it’ll be an exact copy.
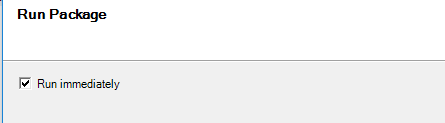
Here I have only one table in my Access database. Click Next and you’ll see the Run Package screen where Run Immediately should be checked.
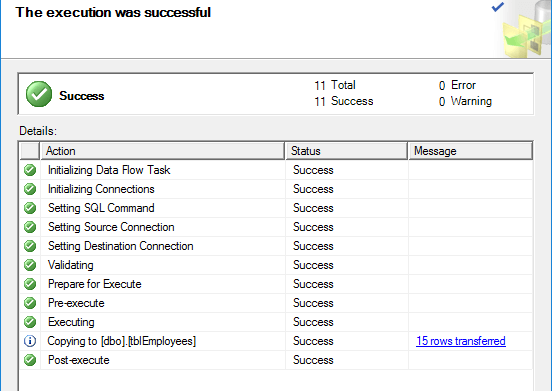
Click Next and then click Finish. You’ll then see the progress of the data transfer as it occurs. After it is completed, you’ll see the number of rows transferred for each table in the Message column.
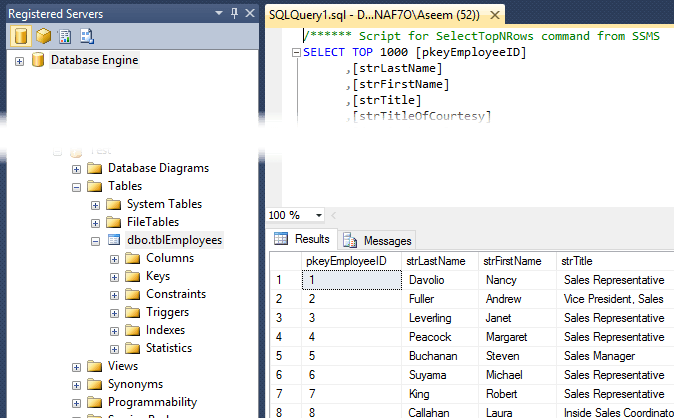
Click Close and you’re done. You can now go ahead and run a SELECT on your tables to make sure all the data got imported. Now you can enjoy the power of SQL Server for managing your database.
Any problems importing your data from Access to SQL Server? If so, post a comment and I’ll try to help. Enjoy!