Upgrading the CPU on a desktop monitor is quite simple. You just need to remove the side panel and the CPU heat sink. And voila, you have access to the CPU. The case is quite different for laptop users. Due to its portability, all the components inside a laptop are compact. So, accessing them can be quite a hassle. This is why we have brought forth this article. Without further delay, let us get right into it.
Things to Know Before You Upgrade CPU
Before we get into upgrading the CPU on a laptop, there are a few things you need to know. First one, not all laptops support a CPU upgrade. Some laptops have a CPU embedded in the motherboard itself. Therefore, always thoroughly research whether your PC has a replaceable CPU chip. Secondly, if the laptop supports an upgradable CPU, ensure you get the correct CPU chip. Check the CPU socket detail and get the matching CPU chip for the socket. To check your motherboard’s CPU socket type, get your current CPU details or view your motherboard’s specification from the internet.
Check CPU Details
Here are the steps to check your CPU details.
Prerequisites
How to Change CPU On a Laptop?
Depending on the laptop, you might need to take out the entire keyboard to access the CPU chip or only the back panel. In both cases, you need to remove the rear panel. In most modern laptops, you can easily access all laptop internals just by removing the back panel. So, in this article, we have only discussed the disassembly of laptops whose motherboard you can access by removing the rear panel.
A non-conductive surface Magnetic Screwdriver Antistatic band Thermal Paste Microfiber cloth (or dry paper towel) 99% isopropyl alcohol Can of compressed air Tweezers Magnetic tray holder
Once you remove the screw, make sure to place the screws on the magnetic screw holder so that they won’t get misplaced. However, before we begin, you should know that changing the CPU on your laptop will void its warranty. Make sure you take pictures of each component before removing them from the laptop. It will make your job a lot easier when you re-assemble these components.
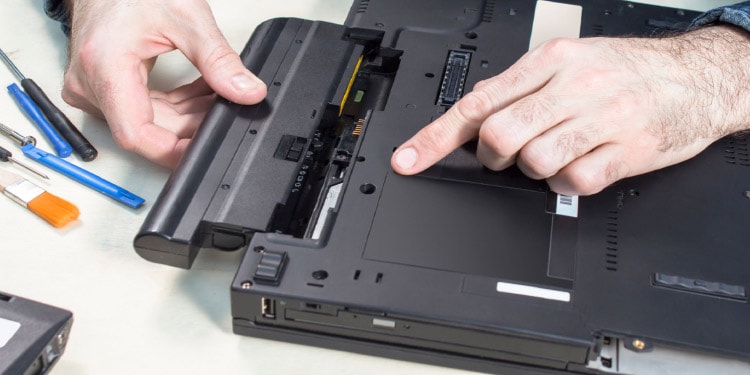
Remove Battery
If you want to upgrade an older laptop, it most probably has a laptop battery that is detachable. To remove a detachable battery, slide the lock that holds the battery and simply pop it out of the laptop. However, if you have the battery inside your laptop, you need to remove the back panel first. Remove the cable that connects the battery to the motherboard. Slowly remove the battery from the PC. Some laptop battery is placed on the board, while some are connected through wire. Please note that some cables have a lock that secures them onto the motherboard. To unlock this, pull on both sides of the lock and gently pull the wire. Once you remove the wire, remove any screw that holds the battery. Remove these screws and slowly pull the battery out of the laptop. Now, hold the power button for 15 seconds to remove any remaining charge from the capacitor.
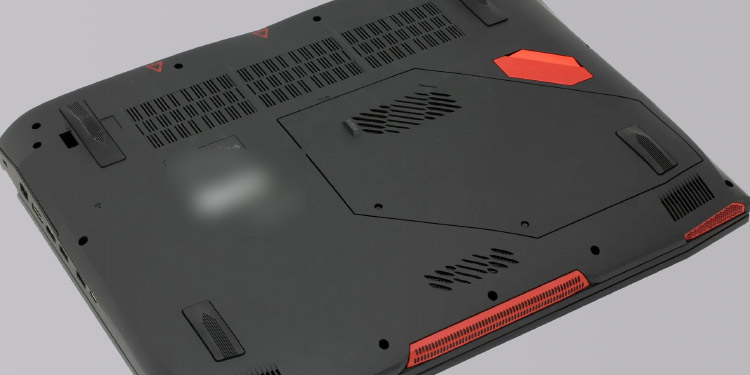
Remove Back Panel
Depending on your laptop, your back cover might be a single unit or the back cover may have compartments. These compartments are there to access RAM and the hard drive without removing the entire rear panel. If it has two compartments, you need to remove this first before you can remove the back panel. If the rear panel has a compartment, you need to remove them first by unfastening their respective screws. Once you remove them, you can now access the screws that hold the back panel. To remove the back panel on your laptop, take a small screwdriver and remove all the screws that hold the panel. Now, remove the rear panel using a flat screwdriver. If you do not have a flat screwdriver, anything hard with a flat edge will do the job. Wedge the flat screwdriver between the laptop case and the back panel. Slightly turn the screwdriver on any side. You should hear a click. You should repeat these steps on all the rear interlocking to completely remove the back panel.
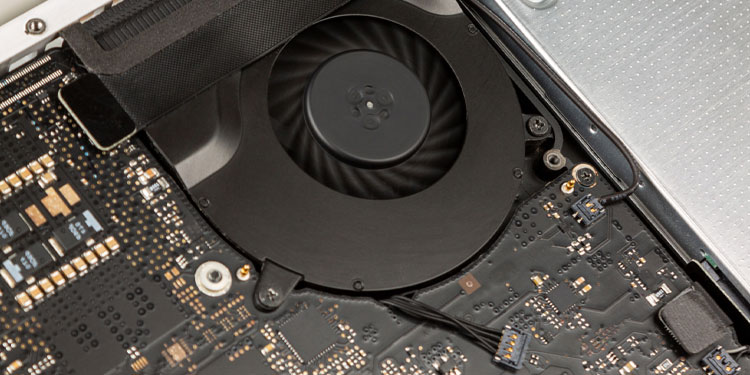
Remove Fan
After removing the back panel and the battery, you still need to remove the fan and the heat sink. First, remove all the screws that hold the CPU fan in place. There should be a wire that connects the cooler to the motherboard. Gently remove this cable. Now, hold the fan and simply remove it from the board.
Remove Heat Sink
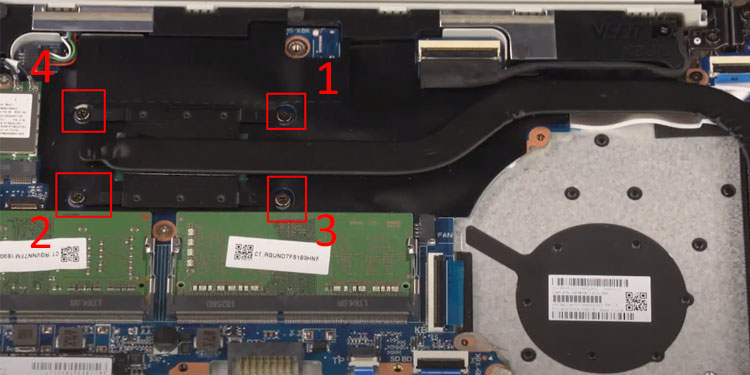
The heat sink is a long copper structure across your CPU and the GPU. Removing the heat sink is also fairly a straightforward method. Just remove all the screws that connect the heat sink to the board. When removing the screws, make sure that you remove them diagonally. Once you remove all the screws connecting the heat sink, remove the heat sink. The heat sink can get stuck due to dried-up thermal paste. Simply wedge the heat sink and remove it. The heat sink will not have any cables that connect to the board. So, you can simply remove them once you unscrew it. Some laptops will have both heat sink and fan attached as one unit. Removing one also removes the other component.
Clean Thermal Paste
When you remove the heat sink, you can see dried-up thermal paste on its opposite end. Clean the dry paste using isopropyl alcohol. After this, you must also clean the thermal paste on and around the CPU chip.
Remove CPU
Depending on the laptop, it holds the CPU chip on the socket in two ways. The first one uses a lever that holds the CPU socket in place. And the second one uses a screw that holds the CPU chip. If it uses a lever, press this lever and push it outwards. Now, this lever should fall back all the way, removing the small metal holder that holds the CPU chip in the CPU socket. Once you fully see the CPU chip, remove it from the socket. If your motherboard holds the CPU chip using a screwdriver, remove this screw and gently remove the CPU from the motherboard.
Insert CPU
Inserting the CPU is fairly simple. Align the mark from the CPU chip to the spot on the CPU socket. And simply let it sit. Do not force the chip into the socket. Once the CPU rests on the socket, hold it in place using the lever or the screw, depending on the laptop
Apply Thermal Paste
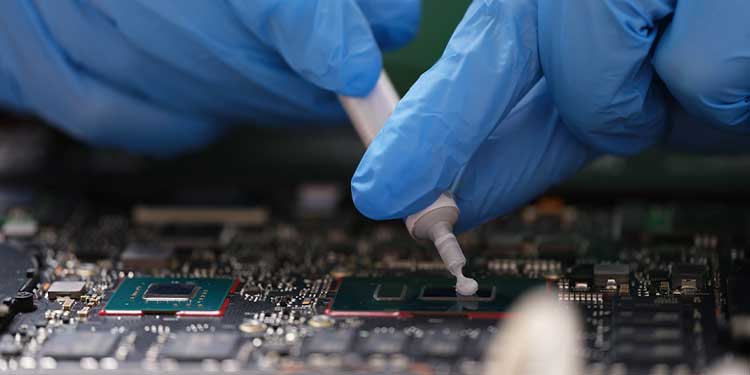
Apply the thermal paste to the chip. The thermal paste may leak from the sides when you insert the heat sink. Therefore, we recommend using a thermal paste spreader to apply thermal paste on every corner of the surface.
Re-assemble Everything
Now that you have upgraded your CPU, it is now time to re-assemble everything. If you face any issues reconnecting everything, use the picture you took previously.
Insert Heatsink
First, place the heat sink and screw it in place. When screwing the heat sink, make sure that you screw them diagonally.
Insert Cooler
Once the heat sink is in place, insert the cooler. As the cooler is out of the laptop, it is also a good time to clean the CPU fans in your cooler. First, gently place the cooler above the heat sink to insert the fans. Now connect the cable to the motherboard from where you previously removed it. Now, insert all the screws and tighten them.
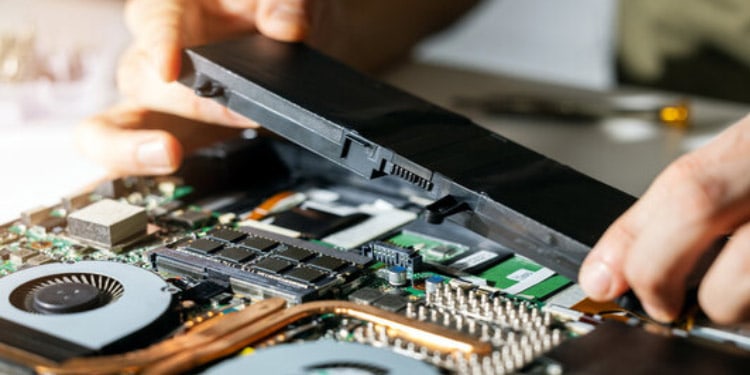
Insert Batteries
To insert the batteries, slide them in place. The batteries on the laptop will only fit one way. If it does not work, turn them and try again.
Insert Back Panel
Finally, once everything is in place, it is now time to reinsert the back panel. However, before inserting it, turn on the laptop to check if it turns on and the fans spin. If it does not, remove and reattach the fan cable. To insert the back panel, align it above the laptop and press it. You should hear multiple clicks from all four sides of your laptop. Now, secure them using screws that you previously removed.
Related Questions
Can I Upgrade Laptop Graphics Card?
In most laptops, graphics cards are embedded onto the motherboard during manufacture. If you have a GPU that’s soldered on the board, you cannot remove or upgrade its graphics card.
Can I Upgrade Laptop RAM?
Most, if not all, laptops have RAM that you can easily remove from the motherboard. You can remove this RAM and insert a better-performing memory module with better memory speed to improve your system’s performance. However, if you are adding a RAM stick, you must ensure that its speed matches the previous memory module.