But you don’t need to worry, as certain tweaks can easily help you set your monitor to 144 Hz. In this article, you will learn the step-by-step process of how to do it on Windows 11. Windows 11 has dedicated display settings that can help configure the right refresh rate for your PC. However, this won’t be possible if you’re using an unsupportive cable or your monitor isn’t compatible with a higher refresh rate. In this section, we provide a simple guide on how to set the monitor to 144 Hz from Windows Display Settings.
Check if Your Monitor Supports 144 Hz Refresh Rate
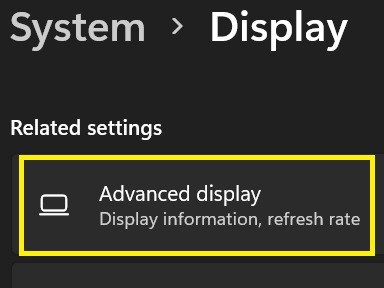
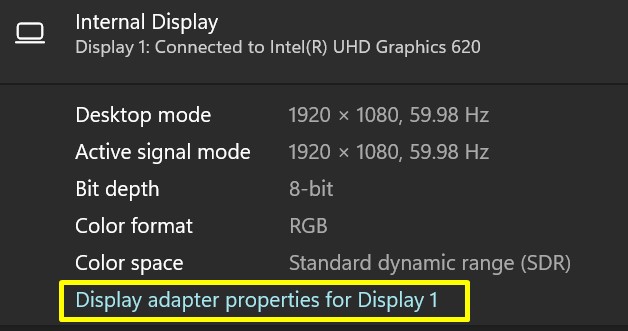
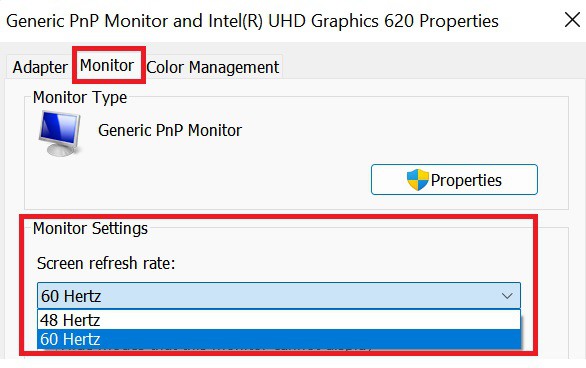
The first step is to find out if your monitor supports 144 Hz. If it doesn’t, you will have to get a new monitor compatible with the high refresh rate. Here’s how you can check whether your display device supports 144 Hz on Windows 11: If you do not see 144 Hz, it’s because your screen doesn’t support this refresh rate. But, if you bought a monitor that actually supports 144 Hz, some other issues might prevent you from setting the refresh rate.
Use the Right Cables that Support 144 Hz
Even if your monitor supports 144 Hz, some outdated cables may not support it. Hence, the second step to consider is checking whether your wires support 144 Hz or not. Well, we are all familiar with HDMI cables, and most of us use them to connect our displays. However, if you’re using HDMI 1.3 or previous versions, you cannot set your monitor to 144 Hz. If you’re looking for detailed information to find out if HDMI supports 144 Hz, you can check out our other post. Moreover, you can use DisplayPort 1.2 or dual-link DVI cables as they both support 144 Hz. Unfortunately, the older VGA cables are incompatible with the refresh rate we seek.
Tweak Display Settings
The final step is to make changes to the display settings. Go through the guide below to learn how you can do just that:
Set Monitor to 144 Hz Using Graphics Card Controllers
If you have installed a dedicated graphics card like NVIDIA GeForce RTX 2060, you get an in-built control panel where you can tweak various settings. However, if you use an integrated graphics card like AMD Ryzen 4000 U, certain software is available to make changes on your monitor. Well, you can visit our other blog post if you’re keen to know the difference between integrated and dedicated graphics cards. In this section, we will cover how to set your monitor to 144 Hz using both AMD software and NVIDIA Control Panel.
Through NVIDIA Control Panel
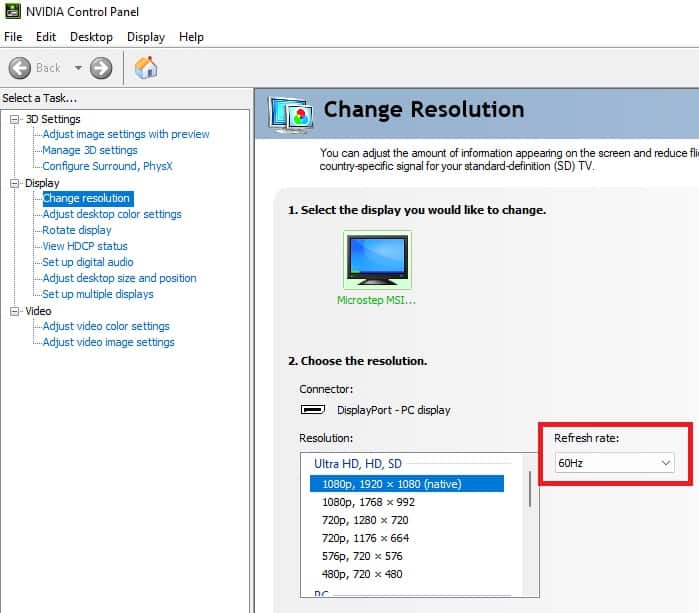
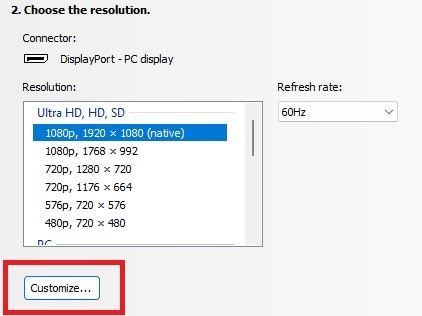
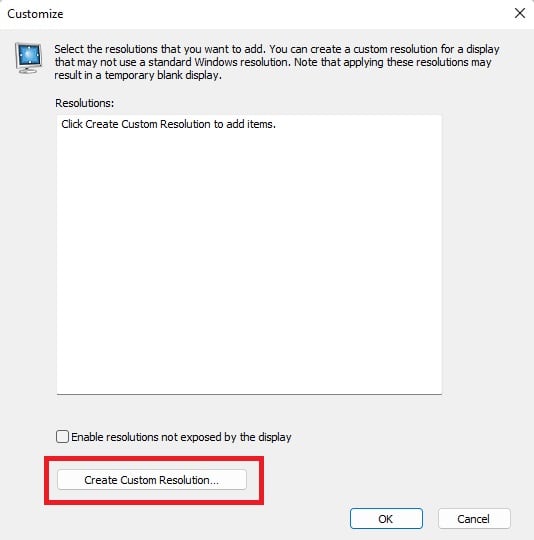
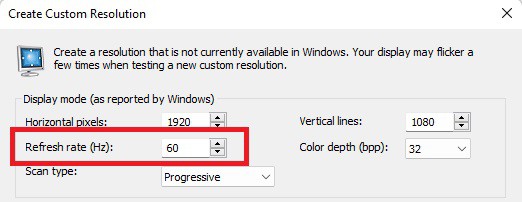
NVIDIA Control Panel is available by default if you use an NVIDIA graphics card. This tool helps configure all the driver functionalities, including improving your refresh rate. Follow these basic steps for setting the monitor to 144 Hz using the NVIDIA Control Panel: On some monitors, you may not see the high refresh rates. In such cases, you can create a custom resolution only if your monitor supports 144 Hz and if you are using the right wires: For some reason, the NVIDIA Control Panel may be missing from your PC. In such a case, read our other article to learn how to fix this issue.
Through AMD Catalyst Control Center
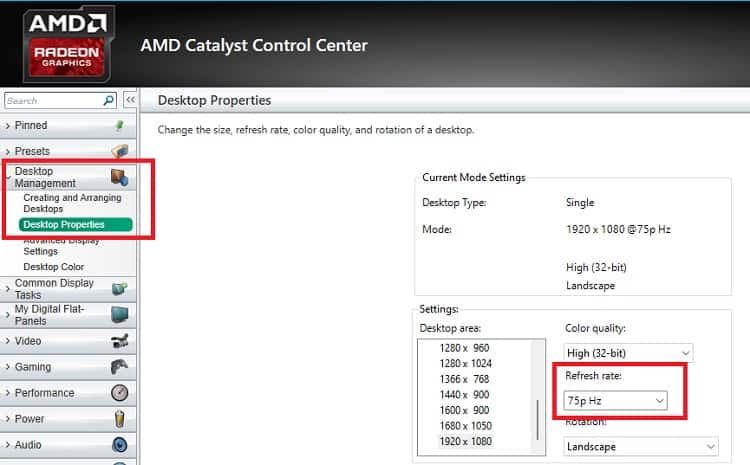
Like NVIDIA, AMD also has its own tools to configure the driver settings. Depending on your GPU, you can use either AMD Radeon Software or Catalyst Control Center. Here’s how you can navigate the software to set the monitor to 144 Hz on AMD Catalyst Control Center:

