The disk management tool comes built-in on your system. The advanced customization of your internal and external storage can only be done through Disk Management. Hence it is an indispensable tool for managing your local disks. This guide is dedicated to making you understand the basics of Disk Management in Windows 11. Here, we mainly talk about how you can access this tool on your computer and how to use it to perform certain tasks. So, here we go!
When to Use Disk Management?
How to Open the Disk Management Tool?
There are a plethora of methods you can follow to access Disk Management in your system. Listed below are all the procedures you can apply to do so. All of these methods are pretty straightforward and simple. You can follow any method you fancy.
Through the Command Prompt
The Disk Management tool can be accessed directly via the command prompt. A correct command shall bring up the Disk Management windows in a second. Here’s how to do it:
From the Start Menu
If and when you want to open an application but you don’t know where to look for it on your computer, the start menu search feature will do the job for you. So, you can open Disk Management through the start menu as well.
Use the Run Command Box
Typing and entering the name of any application in the run command box will allow you to directly access this application with a tap of a button. Here’s how you can access Disk Management via the run command box:
Using the Quick Access Menu
Windows 11 has a quick access menu that allows users to access certain settings ‘quickly.’ Hence, the Disk Management can be accessed via the quick access menu, and it can be done by:
Via Settings App
You can also access Disk Management through the Settings app, and this can be done by following the steps below.
Through the Control Panel
You can use the Control Panel to alter your hardware and software settings. Almost all of your PC configuration settings can be accessed via the control panel. So, follow the below steps to access Disk Management using the Control Panel.
Via Computer Management
Computer Management is an administrative console you can use to control your computer. Here, you can easily change your PC settings and hence, access the Disk Management tool as well. Follow the steps below to do so:
Via Task Manager
Task manager is software the Windows OS provides to view all the processes running concurrently. Through task manager, you can create a new task and open the Disk Management using this task. The steps below show how to do so:
Using Disk Management
Once you open Disk Management, there are some disk customization options for you, namely, initializing a new disk, extending and shrinking the disk volume, and changing the disk letter. All of these services are explained below in brief.
To Initialize a New Disk
You should initialize a new disk when you add it to your system for the first time. This is done because your drive might not appear in the file explorer beforehand. However, keep in mind that initializing a new disk formats everything inside that disk. So, considering this, follow the steps shown below to do so.
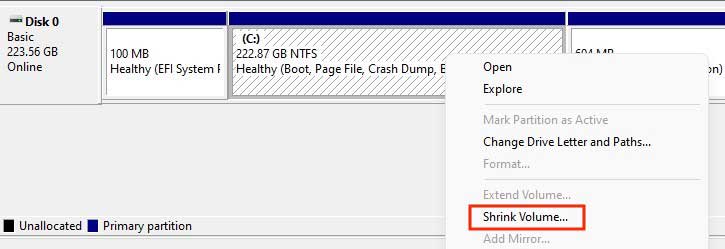
To Shrink the Volume of a Drive
In case you need to allocate extra space to use it for a new partition, you can do so by shrinking the volume of a disk drive. Doing so creates an unallocated space that you can use as a contiguous partition of the same drive. Keep in mind that you can only shrink the volume of a drive that has an NTFS file system. Follow the steps shown below to shrink the volume of your drive.
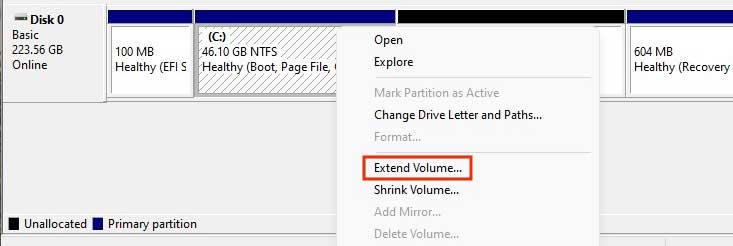
To Extend the Volume of a Drive
As a pretty unknown feature, you can extend the volume of your disk if there’s some unallocated space within it. Extending the volume of your disk is a boon as it increases the storage space within that disk. Here’s how to do it:
To Change Your Drive Name
The Disk Management tool is useful if you want to rename your drive or if your drive has not been assigned a name yet (E.g., C, D, etc.). However, changing the name of a drive with your software and your operating system installed is not recommended. Anyways, the steps below show how you can change your drive name.