Indeed, wrapping up all the peripherals in a single box is not a good idea as this might break the fragile components. So, some of us even hire a professional team to do the job. But what if we tell you there’s quite a simple process to transport a PC all by yourself? Using the right tools and techniques, you can easily pack your computer components and move them wherever you like. In this article, we will guide you exactly on how to transport a PC safely.
Tools Required to Move or Transport a PC
Before packing and making arrangements to move your PC, you need to gather some tools. Well, this is the first and most important step during the whole process. So, given below are all of the important items you’ll need:
How Can I Move or Transport a PC?
Once you’ve gathered all the tools, you’re now ready to move ahead. Whether you’re going to parcel your PC or transport it via any vehicle (car, motorcycle, airplane), we have mentioned the step-by-step guide below on how to do it correctly.
Backup All Your Files
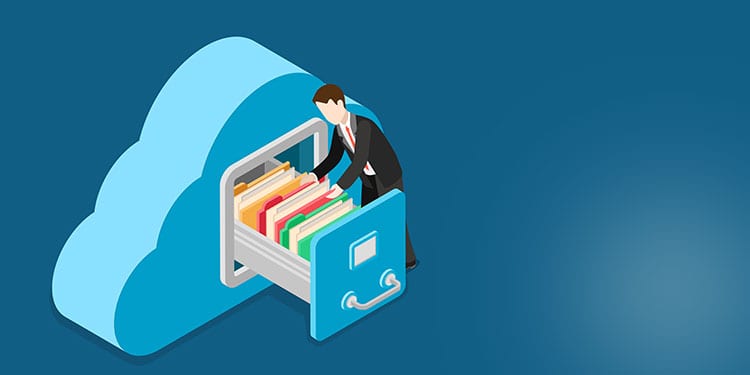
When your PC gets into the vehicle, it will experience a lot of shakes and vibrations. This will cause the recording heads to hammer the disc constantly. So, there’s a possibility that your hard drive may get scratched and lose data. Thus, we recommend backing up all your files and documents before proceeding. Here’s a complete guide to backup Windows 11 to an external drive.
Take a Picture of Your Setup
If you’re not much into tech and have no idea how you’ve inserted the cables, photographing your setup is a good idea. Moreover, we also recommend clicking a picture of your CPU’s inner compartments so that you get to know how they are placed. Later, when your PC reaches the destination, you can check the photos and connect them as before.
Unplug All Hardware Components
Once you’ve backed up all data and taken a picture of your setup, it’s time to unplug every hardware cable. This ensures that the wires do not break when transporting the PC. Well, most modern monitors and other peripherals come with an HDMI cable. However, you’ll likely find a VGA connector on older monitors. For such cables, you need to loosen the two screws to remove them properly. Also, avoid pulling it with force as this might break the connector and your monitor’s port. Once all the cables are removed, take a cable tie to wrap them well. This ensures that your cables do not tangle upon one another.
Separate the Major CPU Components
Your CPU tower consists of heavy components like a cooler, graphics card, and a hard drive. The weights on them can possibly damage the inner CPU compartment. So, it’s not ideal to leave them on their connected sockets. Especially when you’re trying to move it via an airplane, you never know how your boxes will be treated. When the baggage handlers throw these boxes, there’s a high chance the heavy weight on these components might break the motherboard. Thus, we advise removing the cables and providing extra care when packing a CPU. In this section, we will discuss the three important components you need to remove for safety.
CPU Cooler
A CPU cooler, heatsink, or CPU fan is located on top of the processor. Although some of them look small, they can become destructive when they get detached from the motherboard. So, removing the CPU cooler is an important step. Here’s how you can correctly detach it from the motherboard:
Hard Drive
A hard drive is one of the computer’s most important parts as it stores all our files. So, leaving it inside the CPU can be vulnerable. Thus, we recommend removing your hard drive and placing it on an anti-static bag or wrapping it well with bubble wrap. Furthermore, we suggest keeping the hard drive with you instead of packing it along with the other CPU components. Indeed, it is easy to carry and will have fewer chances of theft. Now, let’s focus on the steps involved in taking off the hard drive from your rig tower:
Graphics Card
The Graphics card is located in the CPU’s expansion slot and is quite heavy. So, leaving it inside when transporting your PC will likely break and harm the other CPU components. Thus, it’s better to remove the graphics card before starting to pack:
Separate the Monitor Parts
Once you’re done with the CPU, let’s move on and start to disassemble all the monitor parts. Well, you’ve already removed the power cord and USB cables earlier, and now, it’s time to separate the monitor from its stand. Usually, the removal process is clearly mentioned in the monitor’s user manual. Try visiting your manufacturer’s official site if you do not find it. Indeed, separating the monitor stand is important as heavy pressure when transporting can break it. Generally, most monitors can be unscrewed, and the stand can be pulled off quite easily.
Wrap Everything
With the dismantling part over, we move on to the packaging process. And the first thing here is to wrap every removed component carefully and properly. Here, we will discuss the right way of wrapping every peripheral.
CPU
Once you remove the main CPU parts, you’re probably left with a hollow part. Follow the below steps one by one to properly wrap your CPU along with the removed peripherals:
Monitor
Similar to wrapping the CPU, the next step is to wrap both the LCD/LED screen and stand separately. While doing so, ensure the screen area is heavily wrapped, so the monitor is transported safely. Moreover, we also suggest keeping the screen inside an anti-static bag and wrapping it again. However, ensure you’re not applying too much pressure while wrapping it, as you might break the display.
Other Peripherals
Apart from the CPU and monitor, your desktop has a keyboard, mouse, speakers, and headphones. So, we recommend wrapping the same way as the earlier devices. Regarding speakers, ensure you wrap them separately, so they do not hit each other when transported in a vehicle. Moreover, we suggest using anti-static bags to place your mouse and keyboard.
Place All Components in Respective Boxes
If you have the same boxes, your peripherals came in, use them to pack your devices. Else, you can use appropriate-sized cardboard boxes. Well, we suggest using a separate package for each component. Here are the following things you need to do:
Finalize Your Packing
Once all the devices are packed, get a large cardboard box where all your items can fit. Then, use the same technique as earlier to make a fluffy base and finalize your packing:
Arrange the Packaged Box Properly in Your Vehicle
Whether shipping your packaged PC or taking it somewhere yourself, you’ll probably require a vehicle first. So, the next step is to arrange the box properly in your car or motorcycle. We suggest placing the box in the trunk if you’re taking it in a car. However, you need to ensure that it’s properly placed on the floor. Additionally, you can tie it with a rope to control excessive movement. Moreover, you can also use the passengers’ seats to place the packaged box. But make sure you tie it with the seat belt. If you’re traveling with a friend, you should ask them to hold the box until you reach the destination. If you’re traveling on a motorcycle, we suggest moving one or a maximum of two devices simultaneously. Indeed, you can always come back and take other devices again. Furthermore, when transporting the monitor and CPU, we recommend asking a friend to carry it in the backseat. Else, you’ll need to tie the box properly in the back using a rope. Also, ensure that you’re driving slow and avoiding any bumps on your way.
Unpack to Check for Any Damages
Once your package has reached its destination, your job is to unbox all the items carefully. Despite proper care and tight packaging, there’s a probability your devices may get damaged. So, do check it as soon as possible. Well, if you have followed the right procedure, you shouldn’t face such an issue. But if heavy damages have occurred, there’s no other choice than to replace them.
Clean Everything
Once you’ve unboxed everything, it’s time to clean all your components. Well, you can go through our comprehensive guides on how to clean various peripherals:
Setup Your PC
Finally, you can find a desirable desk to set up your PC. Here’s how to do it the right way: