Modern CPUs that run in 4-5+ GHz clock speed stock and consume multiple hundreds of watts of electricity. It’s like they are a college freshman chugging beer on a spring weekend are capable of generating tremendous amounts of heat. If this heat is not managed properly, your CPU will soon hit the thermal limit and start throttling. A thermally throttled CPU sheds its gigahertz like trees do leaves during fall and long story short, you are no longer a happy camper. To avoid this, you need a good CPU cooling solution. And while a regular air cooler might barely get the job done, having a liquid CPU cooler is much better. Like a regular Toyota corolla vs a Porsche 911 better. Granted, a liquid cooler will be slightly more expensive, and it requires a bit more skill to install. However, your top-of-the-line CPU also deserves a better cooling solution and that is why you are here. We will guide you through this slightly complicated process of installing a liquid CPU cooler in this article. You just read carefully and take care to not miss any steps.
Liquid CPU Cooler Vs. Air Cooler: Which is Better?
As with all things that exist, there are some intrinsic advantages and disadvantages of choosing a liquid cooler over an air cooler.
How Does Liquid Cooling Work?
The CPU generates heat when under stress, which can be transferred out of it via the Integrated Heat Spreader (IHS). IHS is the metal lid you see on CPUs, on top of which some thermal paste is applied before attaching a cooler to it (either air or liquid). Air coolers are solid pieces of metal (either aluminum or copper) with a large number of fins, and have a cooling fan attached to the top so as to disperse heat. All this sits immediately on top of the IHS on the CPU. In contrast, in liquid cooling, the radiator that dissipates heat into the air does not sit immediately on top of the IHS. A baseplate is first attached to the IHS with a layer of thermal paste. The base plate is made of metal and is part of the waterblock, which also sits on top of the IHS. There are two pipes, connected to the waterblock at one end and the radiator at the other end. You can configure the placement of the radiator to your liking. A pump circulates cool liquid in and hot liquid out of the waterblock, and the heat is dissipated through the radiator. Liquid coolers usually come in two varieties – an All-In-One (AIO), and a custom loop. In principle, both are the same. We’ll mostly be focusing on the AIO systems in this article.
Preliminary Work
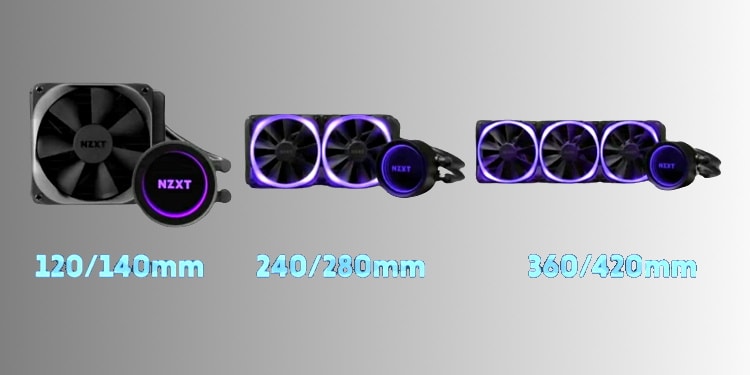
Well, first things first. If we want to install an AIO, we have to make sure that the CPU casing can accommodate an AIO, don’t we? And by we, we mean you. Make sure that your CPU casing is big enough to handle the AIO. Also look into AIO manufacturer’s recommendations, if there are any available. Next, AIOs come in different sizes. The most used sizes are: 120mm, 240mm, and 360mm. If you have a tiny case, you will most likely use the 120mm. The radiator can house a single fan. This size is ideal for non-overclocking casual users. 240mm doubles the 120mm size, which means two 140mm fans. You have a decent, mid-sized casing and you have more than a passing interest in installing a liquid cooling system. Maybe you like to play games with settings cranked up. You might slightly overclock your CPU, but not too much. 360mm screams hardcore, and that is what you are. You like to play games in 4k or 8k cranked to ultra and your CPU has been overclocked to high heavens. Probably. In any case, pick a cooler size of your preference and make sure that it fits the casing.
Installing the Liquid Cooler
Now that you have picked an AIO that fits your CPU case, you are ready to install it. Follow the guide below and use your discretion when necessary. Don’t forget to refer to your AIO’s Installation Guide since different AIOs will have some slight variations in components and procedures.
Preparing the Workbench
First things first, you need to prepare a clean workbench so that you have an easier time keeping track of components. You don’t want to waste time “finding screws that were there just a moment ago.” Put your CPU casing in the workbench, along with a toolkit consisting of screwdrivers. Make sure that bulky components already installed in the motherboard, for example – your GPU, have been removed. Lay out your AIO CPU cooler components. This should consist of backplates, screw adapters, fixing bolts, and fans, along with the AIO block itself.
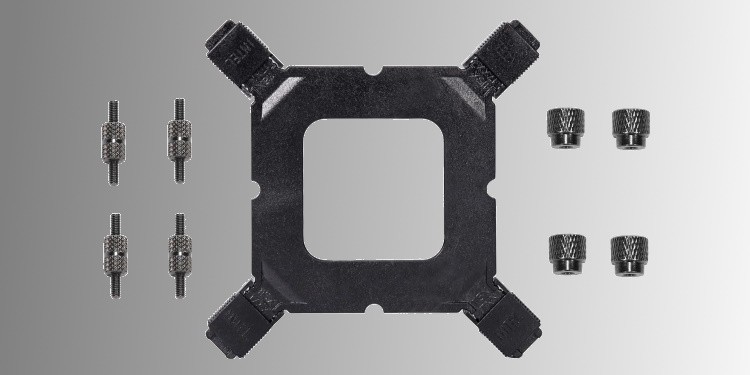
Install the Backplates
You use the AIO backplate to secure the connection between the waterblock and the CPU. The CPU will sit sandwiched between the backplate and the waterblock, and you will create a tight connection by screwing down the backplate. Some cases will accommodate for installing the backplate by having a removable cut-out cover, in which case you can just remove it and you will expose the motherboard where you can fix the backplate. If your casing does not have this feature, you will need to remove the motherboard from the casing. Once you’ve exposed the motherboard where the backplate sits, you will line-up the backplate to match with the screw holes in the motherboard around the area where the CPU sits. Use the provided support screws to hold the backplate in place, and leave them in place. You will use this to screw on the waterblock later.
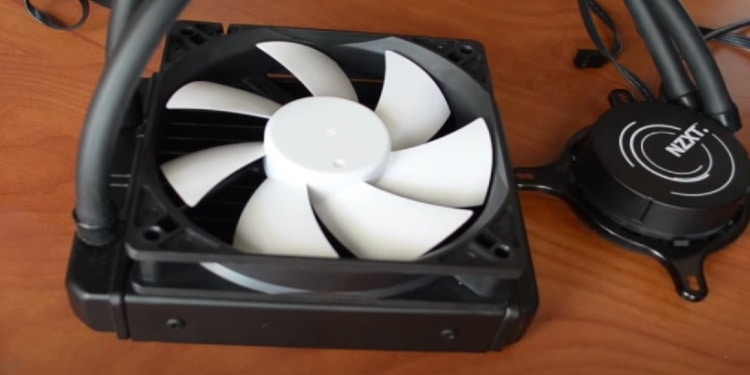
Install the Fans
Grab the included fans and the long screws. You will need to orient the fan(s) in the correct configuration to optimize the airflow. If your AIO has multiple fans, they are probably meant to be connected in a push-pull configuration. Again, refer to the installation guide/user manual for the correct fan orientation. Next, grab the correct screwdriver and install the fan into the radiator with the provided long screws.
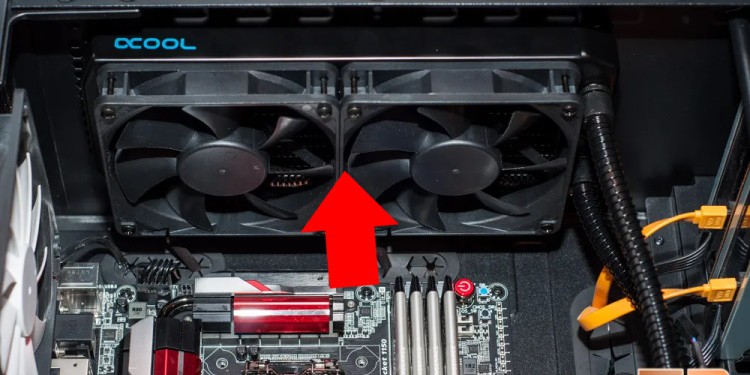
Install the Radiator
The next step is to install the radiator block. You could, in theory, pick up any convenient location to install your radiator, but we strongly recommend that you place the radiator block top-side. Hold the radiator securely in place while you feed the cables through the cutout on the back of the casing. Make sure that the screw holes in the radiator line up with the cutouts in the casing. While still supporting the radiator with your hand, screw in the included screws. You might need to make an adjustment as to the final position of the radiator, so do not tighten the screw yet. Just make sure that they are secure and they can hold the radiator to the case for now.
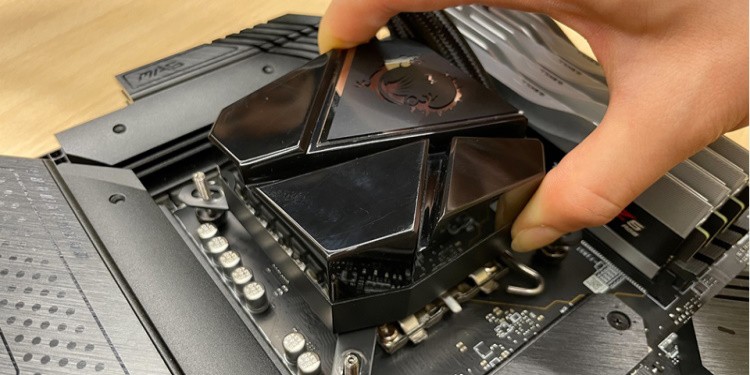
Install the Waterblock
This is probably the most complicated bit of the whole ordeal, so proceed with caution. If you are removing an air cooler, make sure to clean the old thermal paste off the IHS. Usually a thin layer of thermal paste is already pre-applied by the manufacturer onto the waterblock. You can opt to use that if you are a first-time installer. If you have experience with installing thermal pastes, you can install your own thermal paste as well. Your choice. Install the included retention brackets around the water pump. Retention brackets can come in a variety of shapes, depending upon the manufacturer and model, and so refer to the installation guide on the correct procedure on how to accomplish this. Lay your casing on the side so that the motherboard is flat and horizontal. Remember the support screws that you installed into the backplate at the very beginning? (Or the screw adapters in case your motherboard came with a backplate already attached). Line up the pump bracket holes over the support screws and slot into place. Make sure that the pump is sitting flush and horizontal. Attach the thumbscrews (included in the AIO packaging) and screw them in by hand. Screw-in all the thumbscrews and then finish the job with a screwdriver.
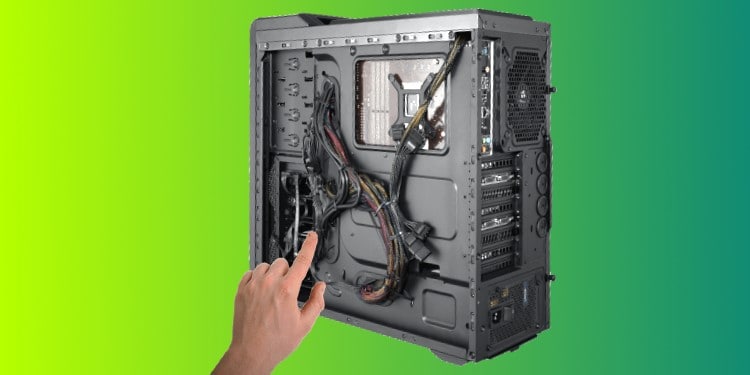
Cable Management
The last thing you need to do is connect the cables so that the thing works and then put them away neatly. Connect the fan cables to the fan headers. If you like your RGBs, plug them in as well. You can daisy-chain your RGB cables. Lastly, plug in the SATA cable to the PSU to supply power into the AIO. Tidy everything up and tuck the cables neatly into the back of the casing. Power up the casing and make sure everything works as intended, before closing the case for your everyday use.