While the idea of having an M.2 SSD may sound exciting, installing it into your system may prove to be a difficult task, more so if you are a novice or don’t know much about PC building. There is nothing to worry though, we got you covered. In this guide we will go through in-detail on how you can install a M.2 SSD on your PC and start enjoying its benefits.
What is an M.2 SSD Exactly?
There seems to be some confusion among people about the M.2 SSD. An M.2 SSD is merely referring to its form factor. An SSD is M.2 because of its small and thin build. Technically, other devices could use a M.2 form factor but SSDs are by far the most common ones. An M.2 SSD generally being smaller than most SSD, is directly mounted and plugged into your PC through the dedicated M.2 connector slot. So, unlike its predecessors, it does not need any cables and is fast due to being connected directly into your PC. Not to mention, M.2 SSD are up to 6 times faster than your 2.5 Inch SSD. There are generally two types of M.2 SSD that are popular in the market. Lets see what each one has to offer and which will be a better option.
SATA M.2 SSD
Like the name, SATA SSDs use the good old SATA interface to transfer data in-between. When talking about speed, SATA SSDs run almost at an equal speed as your traditional 2.5 Inch SSD. Although it is way faster than normal hard drivers. Compared to the 2.5 Inch SSD, it takes up less space and does not need cables running, but that is about it. While they are not faster than the NVMe M.2s, they are more compatible, meaning they are supported by most of the models and are also cheaper than their NVMe counterparts. Like we already discussed, M.2 SATA SSDs use the same controller às the traditional SATA SSD, meaning they are connected the same way onto your motherboard. You can differ a SATA M.2 by its notch, a SATA M.2 SSD has two notches.
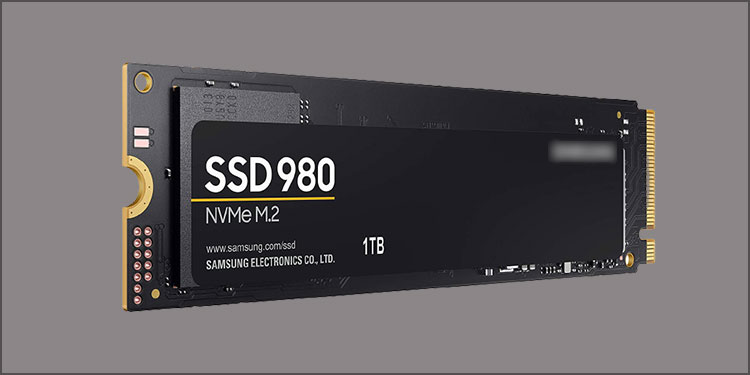
NVMe M.2 SSD
NVMe SSDs on the other hand mounts on a PCIe bus interface. It works with NVMe protocol providing the fastest transfer rate speeds, and yes faster than a SATA M.2 drive. When using a PCIe interface with an NVMe drive, it is able to transfer data up to 4x lanes whilst a SATA can only utilize 1x. This signifies that an NVMe drive is much faster than a SATA drive. While we are on the topic of speed, a SATA M.2 drive is limited to 600MB/s maximum speed. Whereas an NVMe drive utilizing PCIe lanes can have up to 4000MB/s speed. Rather than the double notch, a NVMe drive only has a single notch.
How to Install a M.2 SSD in My Pc?
Once you have decided on what type of drive to get, it’s time to start installing SSD on your PC. Let us go through a step-by-step guide on installing the drive.
Preparing For the Installation
Before you get to opening and working with your PC, you need to keep certain things in check and make sure to have the right things needed to install the SSD.
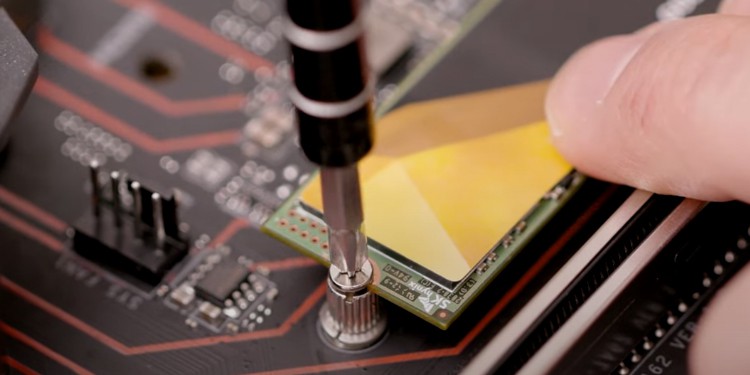
Installing the SSD
Before you begin to install SSD, make sure to shut down your PC. Remove all the power cables that plug into your power cord and lay down your PC flat on a surface (preferably a non-static surface). On laptops, remove the battery by gently disconnecting the wires (refer to your laptops manual for further guidance).
Which One Should You Get?
When deciding on which M.2 drive you should get, there are a lot of things to consider. First of all, you need to check your system specification and verify what type of SSD it supports. Usually, modern systems including laptops have a PCIe interface for a NVMe M.2 SSD. While the storage space that both provide are similar, the difference is in price. Get the one that best fits your budget. As a speed fan, we suggest you get a NVMe drive rather than a SATA. With the new ranges of NVMe drives hitting the market, it is getting cheaper by the day.