System Image is an exact copy of your Windows drive containing everything from your PC’s file structure to the entire operating system. Thus, when you back it up on an external drive, you can quickly recover the content when the computer fails or gets corrupted. Well, one can create different versions of system images. But when the disk space runs out, the newer version overrides the older one. Also, creating a system image backup after each Windows update is a good practice.
How Does a System Image Backup Work?
A System Image is simply a representation of the original disk. In simpler words, it is an image file containing all the disk contents (data, files, folders, partitions, and more). Generally, HDD or SSD has four or more partitions (primary, recovery, extended, logical, etc.). Therefore, creating a system image involves capturing and storing each partition and additional drive as a separate image file. So, when you’re backing up the image, you’re going to store every byte of the partitions on the destination drive. Now, even if your system fails, you can recover it using the backup image. Each of these image units replaces the corresponding corrupted or failed portion. Thus, you’ll be able to restore the system state to its last working version quite easily.
How to Create System Image Backup on Windows 11?
You can create a system image on an external drive or within the primary disk itself. However, we do not recommend the latter, as your data might get lost if the main drive fails. Whatever storage device you use for backup needs to be formatted in the NTFS (New Technology File System). Now, without further ado, let’s dive into the step-by-step guide to creating a system image on Windows 11.
Get Appropriate Backup Drive
First things first, choosing an appropriate drive is essential. Since Windows allows the creation of a system image on a hard disk, DVD or network location, we recommend getting any of these devices.
Launch System Image Backup Utility
Before proceeding to create a system image backup, let’s get a general idea of how to launch the System Image utility on Windows 11:
Backup Windows Image
Once the Create a system image window pops up, you get to choose either of these three options – hard disk, one or more DVDs, and network location. Regarding the same, this section includes the necessary steps for each of them.
On a Hard Disk
Undoubtedly, a hard disk is the best device to store system images. Apart from being cheap, they also offer a faster data transfer rate which can later help recover data much quicker. Kindly follow the below steps on how to back up your Windows image on a hard disk:
On DVDs
If you’re planning to store the system image on a CD or DVD, ensure that it is NTFS-formatted and has enough storage space. You can even use multiple DVDs if the backup takes up a significant size. After inserting the DVD in the right slot, you can now move ahead with the below instructions:
On a Network Location
Unlike the previous two options, storing system images on a network location can be a little tricky. Firstly, you need to ensure that the PC is set to discover network locations. Along with that, it requires your network credentials, and you can only keep the most recent image here. Below is the complete guide on how to create a system image backup on a network location in Windows 11:
How to Use System Image for Windows Recovery?
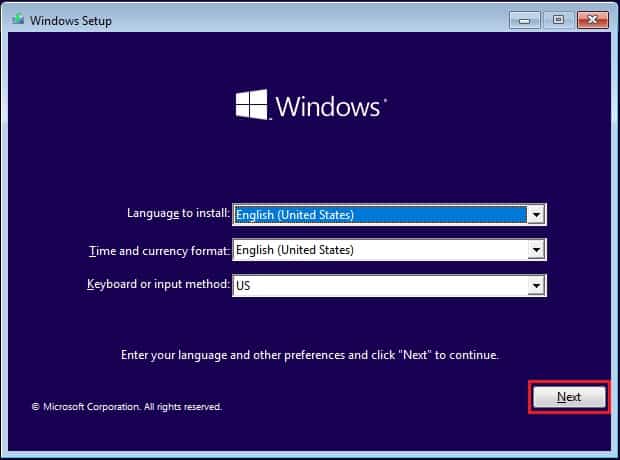
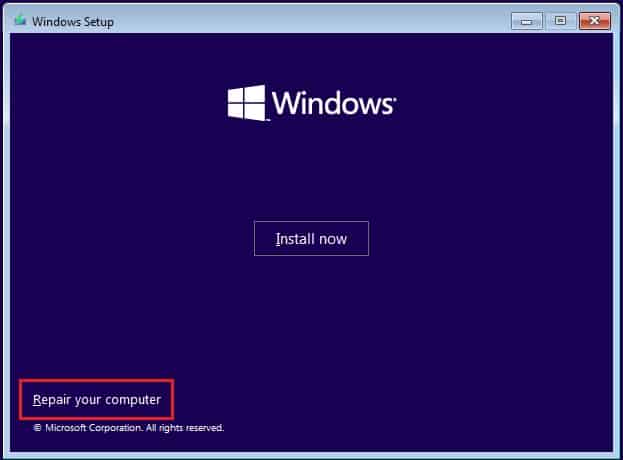
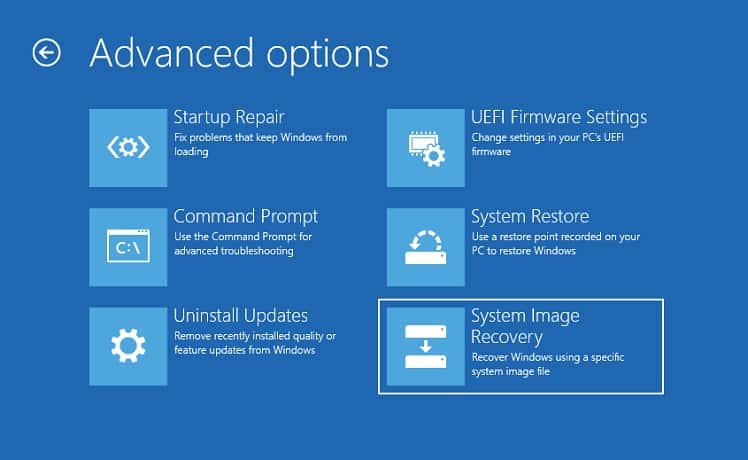
A possible result of hard drive failure is that Windows doesn’t start. If you already have a system image backup, it’s relatively easy to restore the OS, files, and other settings to their working state: