Read The Manuals! (Especially Motherboard and Case)
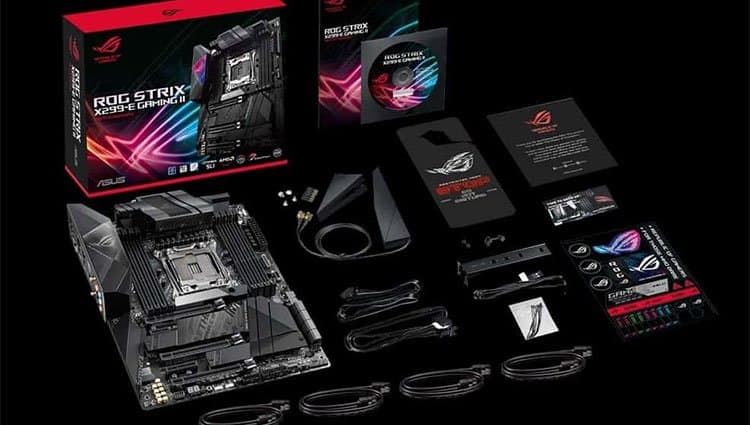
This is the big one: Read Your Motherboard And Case Manuals! I cannot stress enough the importance of reading your manual. These will be the most functionally unique parts of your first computer build and are highly unlikely to match any build guides you may be consulting. For the PC I built for this article, I used a Mini ITX NZXT H210i- I wouldn’t recommend a Mini ITX case for a newcomer, but you should still be able to follow along decently well!
Keep All Boxes and Anti-Static Bags Until End of Build
A common beginner builder’s mistake is to toss away things you think you don’t need early in the build, only to scramble desperately to find them in a pile of empty boxes mid-build. Don’t let this be you! Please don’t throw anything away or lose track of where it is until your PC is entirely built!
Gather Necessary Tools (Do NOT Skip!)
A Phillips head screwdriver, smaller is better- this is used for installing your motherboard and other componentsA stable place to hold all of your screws, preferably magneticAny anti-static equipmentA pair of tweezers is also handy for inserting and removing small screws.Plastic Cable Ties for cable management.
Prepare Installation Media (USB or DVD)
If you’re using a regular retail (DVD) copy of Windows, you don’t need to do any extra setup. If you want to install using USB, use this tool on another PC to create a Windows installation USB drive. Alternatively, you can use Rufus to create the installation media if you already have a Windows 10 ISO.
Clean & Prepare Your Workspace
First and foremost, you’re going to need a clean, flat surface for you to work on. Most tables will do fine in this regard- make sure that it isn’t wet/dirty if you’re building outdoors. Secondly, you’ll need to evaluate your environment. If you don’t have any anti-static equipment, you’re going to need to work in a place where static buildup is unlikely to occur. This means no carpeted floors and something to touch to ground yourself- even if it’s just a metal part of the inside of your chassis.
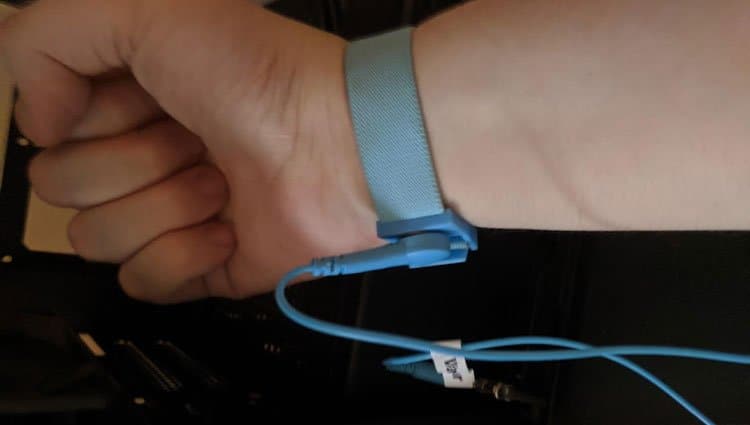
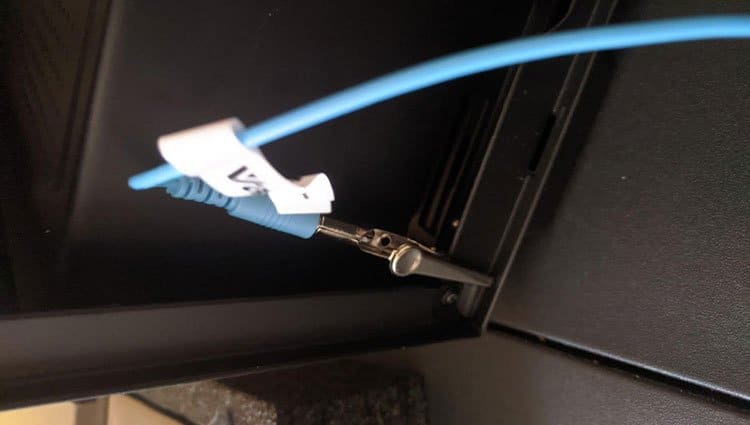
Account For Static Discharge (Wrist-Strap, Mats, etc)
If you have anti-static equipment (like an anti-static wrist strap or the anti-static bags that will come with your motherboard and GPU), now is the time to make sure it’s all set up. This means hooking your anti-static wristband or mat to a grounding point (as pictured below). With the anti-static bags that came with your motherboard and GPU, place these components on top of them. This is where you’ll want to rest them throughout the rest of the build process. Now that you have a clean workspace prepared with everything you need, it’s time to get started!
Open Up The Case and Manage Cables
First, remove both side panels from your case. If you’re dealing with a tempered glass panel, be extra cautious and find a safe, soft place to set it down while you’re working on the inside of the build. A properly-cased pillow can do the job here; make sure nothing applies pressure directly to the window. Inside the case, there will already be some cabling for your case fans and front panel connections. Route these through cable management holes for the time being, preferably closer to the top of your case, so it’s easier to plug them in later on in the build.
Note Clearances
This is an important part: keep your clearances in mind! Be especially sure here and later in the build that no cords are in danger of coming into contact with either CPU or case fans because the result could be…fiery. (As in, you might actually start a fire, and your hardware is definitely screwed.)
Install The CPU Onto The Motherboard
To Install an Intel CPU: To install an Intel CPU, you’ll need to first push down on the retention mechanism and move it slightly to the side to get it free. Then, pull back on this lever to reveal the bare CPU socket – you don’t need to remove the black plastic thing here. It’ll pop out on its own after installing the CPU- and gently place your CPU inside, aligning the triangle on the corner of the CPU with the triangle in the socket. Confirm before proceeding that your CPU is properly aligned. As long as it is, you can push the socket cover back down and lock it in with the mechanism you undid earlier- this will make some noise, but as long as your CPU was properly installed earlier, you have nothing to worry about. Video Guide: To Install an AMD CPU: AMD CPUs differ from Intel CPUs in that their sockets are pinless- instead, all of the pins are on the CPU itself. This has its own pros and cons, but for building, it essentially means that all you have to do is raise the retention arm, gently lower the CPU into the socket (aligning it with the triangles while doing so, like with an Intel CPU installation), and… you’re done! Well, after returning the retention arm to its previous position, and as long as you didn’t meet any resistance on the way down. If you’re unsure, watch the video embedded below.
Install The CPU Cooler
If using a stock cooler, you don’t need your own thermal paste! It’s pre-applied on the heatsink. All you need to do is install it. If you aren’t using a stock cooler, you may need your own thermal paste – click here for our recommendation. These instructions are meant only as a guideline, especially if you’re working with a third-party cooler! Always consult the official manual! When it comes time to install your CPU cooler, make a note of the four screw holes around your CPU socket- there are mounting points for your CPU cooler. Now, apply a thermal paste blob about the size of two grains of rice on the center of your CPU. Being careful to align the bottom of the cooler with the CPU and the screw holes, gently lower the cooler into place onto your CPU. Next, screw it down on opposite diagonal corners, and be sure to plug the CPU cooler fan into the CPU-FAN header on your motherboard, which should be close by. With an AMD stock cooler, you’ll need to use the latching mechanism on both sides to lock the cooler into place. Video Guide: Stock Coolers (Intel and AMD)
Install The RAM
Fortunately, RAM is one of the easiest components to install! First, identify your RAM slots and the corresponding tabs at the edge of each slot. If you’re using a motherboard with more than 2 RAM slots, consult your manual to determine which order to mount your RAM sticks in- if it’s just two slots, the order doesn’t matter. Push back these tabs, then align the RAM sticks with their slots and slowly push them down into the slot. The tabs will push up and lock into place when you do this. Remember to push down the tabs before installing RAM- besides that, it’s a pretty clear-cut scenario!
Install Motherboard
Now for everyone’s favorite part of PC building: standoff screws! Think of a standoff screw as a screw with a hole for yet another screw, meant to secure whatever is between them- in this case, your motherboard.Take a look at your empty case, and before laying it on its side, note the location of your standoff screw holes. These will align with the same holes in your motherboard. If you notice that they protrude, you’re in luck: you don’t have to screw them in yourself! In older cases, you may have to, though. Once you’ve confirmed the location of your standoffs and/or installed them, it’s time to put them in your motherboard over the standoffs. Then, use the screws supplied with your motherboard to screw it in!
Install Fans & Run Fan Cables
Chances are you already have a few cases fans pre-installed, but in case they aren’t installed, or you bought extra fans, you’ll want to mount them right about now. Fortunately, this is pretty easy: just use the included screws at marked fan slots inside your chassis, hold them on one side and screw them in on the other. Tilt your case on its side or screw in opposite diagonal corners first if you’re having trouble.
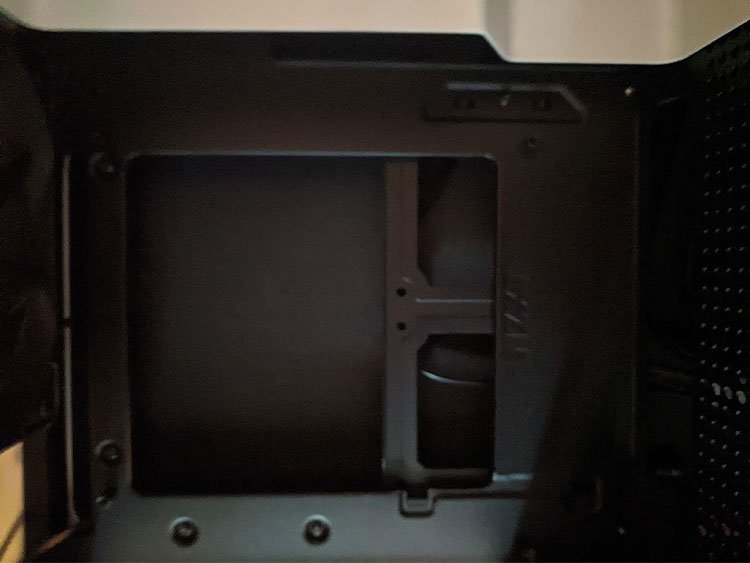
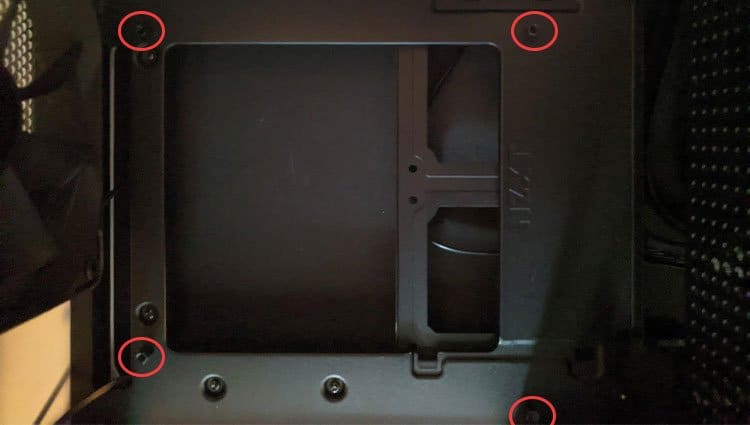
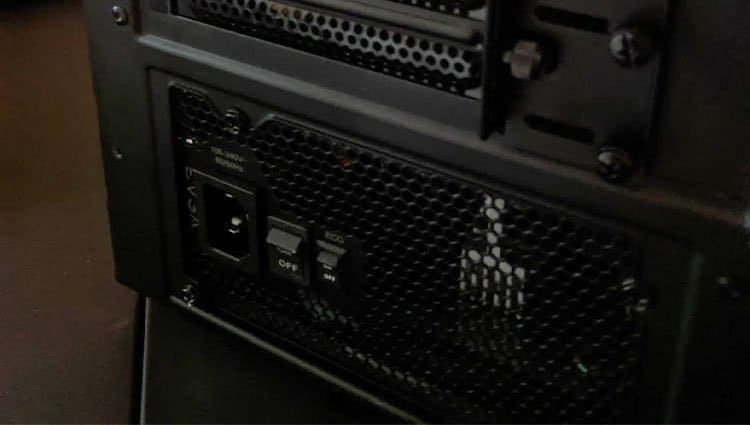
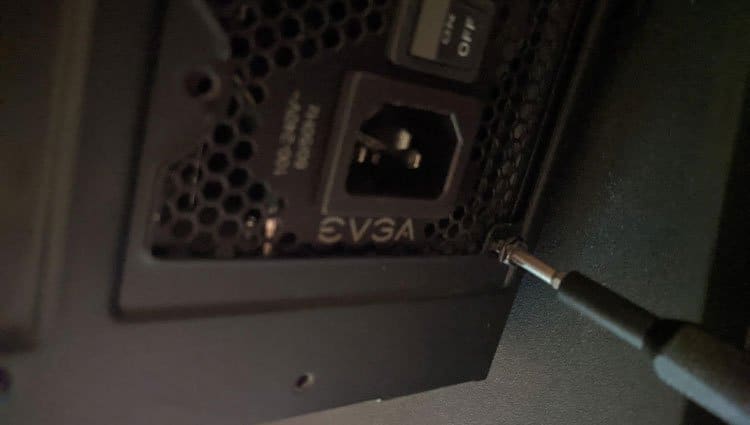
Install PSU and Run CPU & Mobo Power Cables
Push your PSU into the case (outlet side facing out) until screw holes on it align with the screw holes in your chassis. Once aligned, simply screw it in! Do make sure the Fan intake side of the PSU faces the grills of the case, so that it can suck in fresh air and expel hot air without any help from case fans.
Install Front Panel USB, Audio, and ETC Cables
The cables that came with your case- namely for front panel I/O, USB, and audio- need to be plugged in sooner or later. This is the time to do it, but exact instructions vary greatly depending on the case and motherboard- you’ll need to consult both of their manuals for this process.
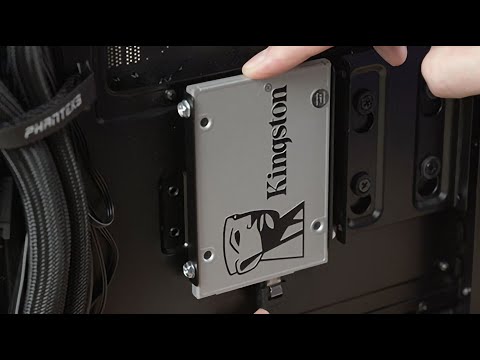
Install SATA Drives (3.5 HDD and 2.5 SSD)
In order to find where SATA drives are mounted in your case, consult your case manual. Once you’ve mounted the drive, you’ll need to plug in both the SATA cable and power cable/strip. The SATA cable will go into a corresponding SATA port on the motherboard- shaped like an L- and the power cable should run back to the PSU. Watch Video:
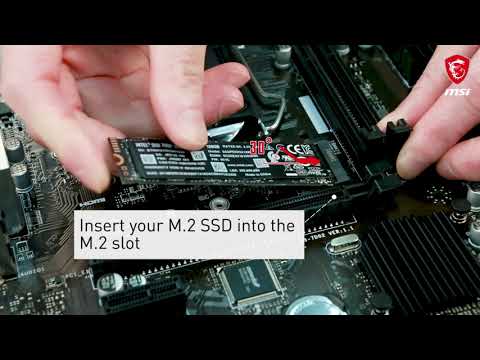
Install M.2 Drives
M.2 drives require dedicated M.2 slots on your motherboard. These slots will usually be on the front, but one may also be on the back, especially if you’re building inside a mini ITX case. The M.2 slot on your motherboard should come with a pre-installed screw on the opposite of the connector- unscrew this before proceeding, as you’ll need it to finish the mount. Now, all you need to do is insert the M.2 drive into the slot and lay it flat against the slot. The circular gap at the end of the SSD should align with the screw hole at this point- steady it to make sure it does, and then re-screw it in. Watch Video:
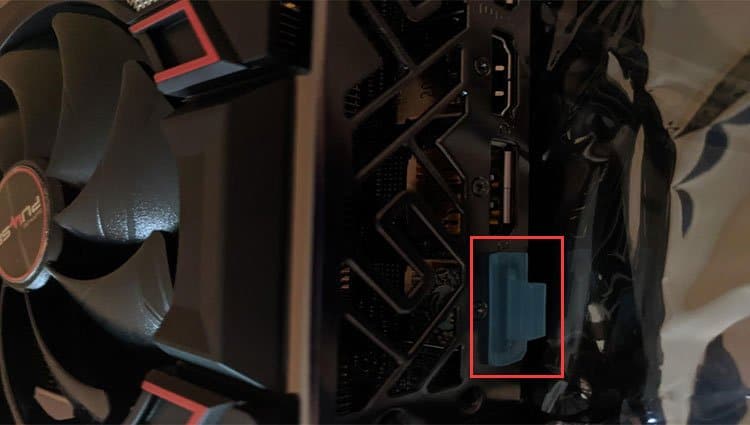
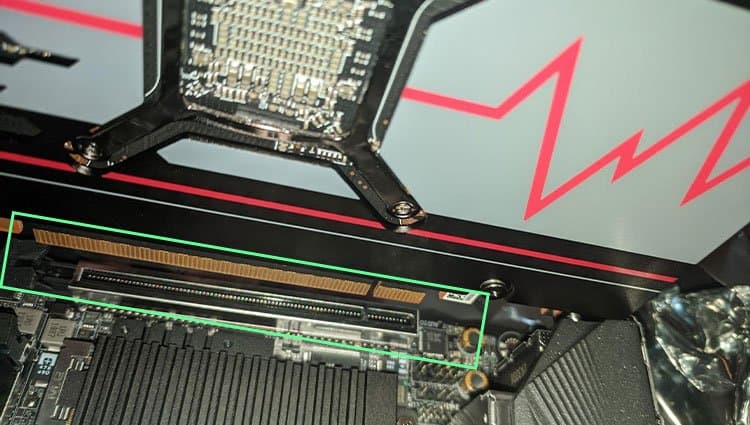
Install GPU
Before doing anything else with your GPU, note the plastic tabs inside of the I/O slots and remove all of them. Not just the one you’re going to use, all of them – one of our writers had the misfortune of leaving his inside an old graphics card and needing to use a set of pliers to free up the slots. Before attempting to mount your GPU, you’ll need to unscrew the PCI Express slots in your chassis to make room for it. Keep the screws, though! Fortunately, actually installing the GPU is pretty dead-simple. All you need to do is align it with the PCI Express slot on your motherboard, and push it down firmly to install it. Next, you’ll want to take the screws you removed earlier and screw them back in, securing your GPU in place inside your case. If its manual says it, you’ll need you to plug in an 8-Pin power cable or more, and you’re ready to use your graphics card!
Final Cable Management & Double Checking
This is the time to double-check everything if all of your cables are routed properly and securely plugged in. Double-check the following connections especially:
Is the motherboard power cable plugged in securely?Is the CPU power cable plugged in securely?Are any SATA drives powered and plugged in?If the GPU has an 8-pin power connector, is that plugged into both the CPU and PSU?Are all case fans plugged in?
If you’ve answered all these questions, put your side panels back on, plug in your PSU, turn on your PSU, and hit the power button! If it powers on, you’re ready to proceed. Now that you’ve built your PC, it’s time to get it up and running!
Install OS and Manufacturer Drivers
Installing your OS is as simple as plugging in your USB/inserting your DVD, powering on, and following the on-screen instructions. For manufacturer drivers, though, you’ll need to consult your motherboard make and model and retrieve the latest drivers from their website. As an example, the PC we built in the writing of this article used a Gigabyte Z490i Aorus Ultra. A quick Google search brings us to the Drivers/Bios/Software downloads for that particular motherboard. (Skip any GPU drivers for the moment- you can get those from AMD or Nvidia directly.) If prompted to restart, do not do so until you have installed ALL relevant drivers to your motherboard.
Use Ninite To Install Your Favorite Applications Quickly
Now that you’ve installed your basic drivers, head to ninite.com. Using the application located here, you can quickly and conveniently stall dozens of popular applications at once, such as Steam, Discord, Dropbox, Chrome, Firefox, Malwarebytes, and more. Chances are, at least a few of the apps you want are included in this bundle! (Steam still usually needs an update afterward, though.) Now that you’ve installed your drivers and favorite apps, you need to do just one more thing before you get up and running: install your graphics drivers!
Get Radeon Software (AMD Graphics)
If you’re using an AMD graphics card, you’ll want to get the drivers straight from AMD. Note your make and model, and use the page linked below to get the right download for your system. Click here to download Radeon Software.
Get GeForce Experience (Nvidia Graphics)
If you’re using an Nvidia graphics card, get the drivers from them! Check your GPU model (i.e., GTX 760 or RTX 3080) and download the corresponding driver from the page linked below. Click here to download GeForce Experience.
Get Intel Graphics Control Panel If Not Already Installed
While this should auto-install if you’re using Intel graphics, there is a chance it may not. If this is the case for you- you can check by searching “Intel Graphics” in Windows search- click this link. I want to say a great job! If you followed all the steps listed in this guide, you should have a brand-new pc built all by yourself. Tell all your friends how awesome you are, and be sure to have fun with your new pc.
Beginners First-Time Building Mistakes
Too small of a workspace Small workspaces become problematic during a typical PC build. The floor is typically a poor choice when building a PC. Carpet is prone to generating static electricity, which can damage your components. It is essential to find a table or solid surface with lots of room. Access to another internet-connected device You need a separate internet-ready device. This can be a cell phone, laptop, tablet, etc. You can access the guide, search google and find answers to common problems you may be having with your build. Ignoring Cable Management This is a mistake that I have seen even experienced builders make. Take an opportunity to visit this website and view some good examples of cable management. Cable management keeps your system looking neat and tidy, minimizes dust collection, and creates proper airflow inside your case. Failure to Read Manuals Everyone’s done it; they look at a project, think how hard it can be, and something doesn’t go right, or you have to start completely over. The motherboard manual is the most important manual out of all of your components. Critical information like connecting your front panel USB, sound, and power buttons are essential, and if you don’t follow your manual, you might not be able to even turn on your computer when you are finished. Forgetting to Install I/O Shield A first-time mistake made by many builders. If you fail to remove it and install the one that comes with your motherboard and connect all peripherals, you cannot install it afterward. You will have to unplug everything, disconnect the GPU, and remove the board to install it. Not Installing Mobo Stand-offs These brass stand-offs protect your motherboard by keeping them from making contact with the case. This contact could cause your mobo to short out. If this happens, you may need a new motherboard or other components. Improper Handling of Components The components of your computer are pretty delicate. It is important to take precautions when installing and handling them. Without using Anti-Static wrist straps properly clipped to your case, you could short out your new RAM, CPU, and GPU. Also, if you don’t handle your CPU from the edges, you risk damaging the pins on an AMD CPU. Proper Amount of Thermal Paste Installing too much thermal paste can squeeze out upon installation of the cooler/heatsink. The thermal paste could get onto the motherboard and create a mess. Place one drop the size of a grain of rice right in the middle on top of the CPU. Take a look here at the suggested application of thermal paste. Failing to Install RAM in Dual Channel If you have purchased a dual-channel RAM kit. Your mobo’s manual will explain in detail how to install your RAM. Dual channels are often staggered. Meaning, if you have four RAM slots, you would skip one slot and install in the next one. In the image below, you can observe if you had two 1GB chipsets. You would install one in Channel A, Slot 0. The other 1GB chipset in Channel B, Slot 0. Failing to Plug-in All Cables This is a common mistake as well. If every component from your mobo, GPU, SATA drives, Cooling Fans, I/O ports, etc., must be plugged in. Failure to do so will cause some or all of your computer components to fail to boot up. Before you plug it in and boot up, double-check all components, power supply, and cables. Installing Fans the Wrong Way When cooling your computer, you must remember you want to pull fresh air in and warm (dirty) air out. From personal experience, you get optimum results if you install front fans pulling in the fresh air and all rear fans pulling air out. Plugging in Monitor and not GPU This situation typically only is a problem when purchasing a board with onboard video. However, you need to recall that if you bought a GPU, it goes in the lower expansion slots of the case typically. If you plug in your monitor to the mobo’s onboard video, you may not see anything displayed. Double-check your connections before booting up. Working on PC While It’s Turned On This is something that doesn’t need much explanation. However, keep in mind that this can be dangerous, and you could seriously damage your components by static electricity or shorting out something accidentally. Safely shut down the PC, unplug it, hold the power button for about five seconds, open the computer, and continue your work. Using a Bad Outlet or Outlet on a Switch This one is more popular than you can imagine. I received many tech calls, and after troubleshooting over the phone, I learned to start with this one. Try another wall outlet, and if you are using a surge protector, verify the switch is turned on. You would be surprised how many times this resolved a tech call.