The issue seems daunting, and it requires some tech knowledge. Like changing the console’s NAT Type, you’ll likely have to mess with your router’s admin page. Luckily, we’re here to help you, as it’s not as difficult as it sounds. In specific, the double NAT error often occurs out of nowhere while you’re playing online. The official explanation is that you have two networks trying to assign a NAT category to your Xbox. Typically, it’s the result of wrong configurations when using a gateway (modem/router).
Xbox One Double Nat Error
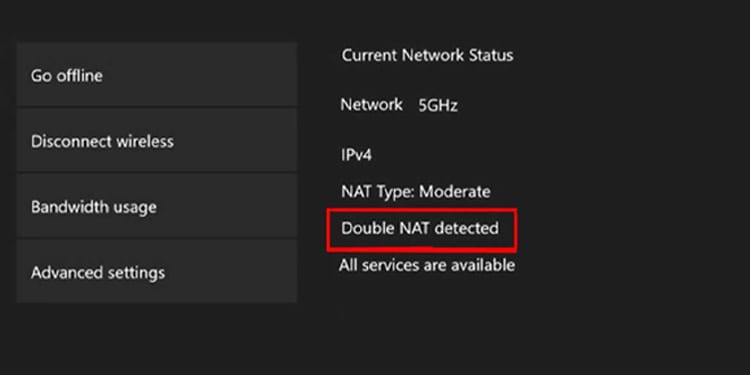
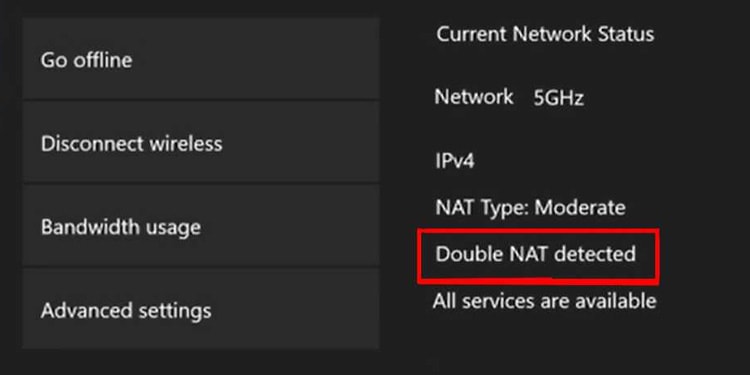
First, you need to understand what “NAT” means. The acronym stands for Network Address Translation. It’s the protocol that translates the IP address of various devices in a local network into a single address. After, the single address goes to the router. At the same time, the router delivers an internet connection to the devices. Finally, the NAT Type configuration comes innate with your router and ISP and determines how it can interact how your IP addresses (internet-connected devices) interact with other devices: A Double Nat Error occurs when multiple routers or gateways are trying to establish a connection between your Xbox One and the internet. In simple words, your Xbox console is trying to connect to a secondary router instead of your main router. It’s a security measure rather than an error, but it’s not convenient for gamers. See, the “Double NAT” message prevents your device from building a steady connection for playing online. As a result, your multiplayer becomes limited or inaccessible. You’ll find a “Double NAT Detected” message on the Xbox’s Network menu, and you can’t access online gaming. Alternatively, a multiplayer playtime ended abruptly before seeing the message.
How to Fix Xbox One “Double NAT Detected” Error
Removing the “Double NAT detected” error requires removing the troublesome router or gateway. Alternatively, you’d need to set up your Xbox’s internet connection again. The troubleshooting works for the Xbox One and the Xbox Series family regardless of the solution. Remember, both generations share interfaces and services. However, you should be clear on the type of device you have:
Router plus a modem: These are two separate devices. The modem receives internet from your ISP via a telephone cable and sends the signal to the router via an Ethernet cable. Then, your devices connect to the router’s Wi-Fi network.Gateway: Most people know gateways as modem/routers or cable modem routers. It’s a single device that receives internet from your provider and sends a Wi-Fi signal to your home devices. You’ll also identify a gateway if it has multiple ethernet ports on top of the telephone cable port – modems only have a single ethernet port.
After knowing this, perhaps you realized your error: you’re using both a router and a gateway.
Set Up “Bridge Mode” on Your Gateway
We recommend configuring your main router or gateway in “Bridge Mode.” The solution only works better if you gateway, as most routers don’t have the option. The Bridge Mode disables the NAT and routing functions, which turns the router into a simpler pass-through modern. In other words, it won’t limit your IP address. You’d need to navigate to your router’s admin page. You can do this by typing its IP address on your web browser, and you can find the address in one of two ways: Once you browse to your router’s IP, you will have to enter the default username and password. These are also at the back of the device. Otherwise, this should work for all router brands:
Username: admin Password: admin
You or somebody else may have already logged into the router’s admin page and then changed the password. If the password is not saved on your PC, you may have to ask the router’s admin for the password. Otherwise, you can reset the router by pressing its reset button with a pin. It’s usually within a small hole in the rear or the back of the item. Then, after you reset the router, go back to its admin page and log-in with the default username and password. Lastly, once you’re within your router’s admin page, navigate to the wireless options, enable Bridge Mode, and save the changes. The process is different on all router brands, as every model comes with its interface and options. So you will have to find it yourself. Typically, it’s within the Wireless menu, and you may see it as “WDS Bridge.” If you can’t find the exact steps, we recommend you find a brand-specific tutorial online.
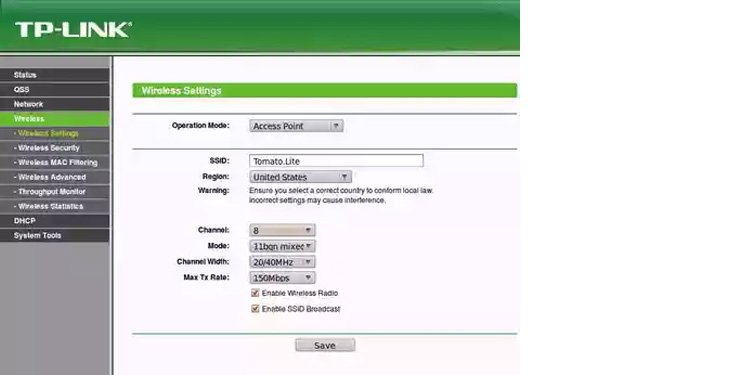
Enable Access Point on Your Router
If your router doesn’t have a Bridge Mode option, there’s another way to avoid the Double NAT. The solution is making your Xbox One an access point. Again, this option is specific for routers only. Gateways won’t have this option. You may find the option within Operation, Operation Mode, Network Mode, Network Operation, Wireless, Wireless Setting, Wireless Configurations, or similar menus.
Remove the Router if You Have a Gateway
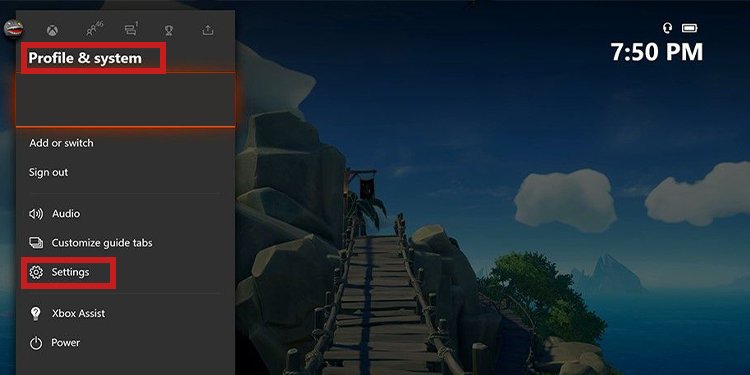
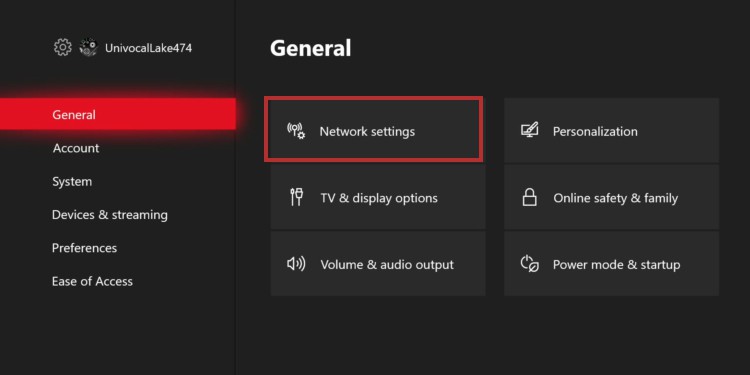
If you’re using both a router and a gateway, you must remove one from the network. We recommend you stick with the gateway and abandon the router for now. So unplug the router, and store it in a box. First, though, put the gateway on Bridge Mode, as I explained above. As I said, it will remove its NAT restrictions on your network. Afterward, you’d have to re-check your Xbox’s network settings:
Use an Ethernet Cable
If all else fails, you’d need to remove the “Wi-Fi” entirely from the formula. The solution is plugging your Xbox directly into the gateway or mode. If you can’t set up your Xbox and monitor in such a way, there’re items you can use:
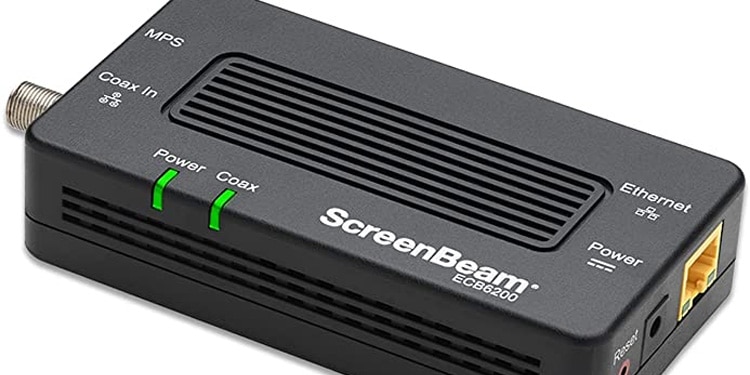
A MoCa adapter allows you to extend your gateway or modem with a coax cable and plug a device directly into the Moca adapter via its ethernet port. It will enable you to extend your internet without routing a super long ethernet cable. In particular, you can use as many Moca extenders as you’d want. A Powerline ethernet adapter receives and preserves the Wi-Fi signal and has an ethernet port. You’d plug it on a nearby plug and connect it to your Xbox with the ethernet cable.
After you connect straight to the modem or gateway, restart both the console and the internet device. Then, check the console’s network settings to see if the “Double NAT” error persists.